MyRemoteShare is a tool which enables the Vscan Air user to initiate a collaboration session with one or more remote participants, during which the user can optionally share the scan screen and camera feed from their mobile device and have an audio conversation. This tool is powered by Zoom and utilizes the Zoom for Healthcare application. It is compliant for use in healthcare environments (e.g., HIPAA compliant in USA).
If purchased, this feature will be accessible with the left panel Presets
NOTE:
MyRemoteShare is provided for education, training, and support purposes. It is not intended for diagnostic use since the quality of the image feed seen by the remote participant will depend on the user’s and participant's network connection as well as the display device used by the participant, and as such cannot be guaranteed.
• The user of the Vscan Air app is responsible for the remote participants selected, the content shared, and for obtaining appropriate patient consents if applicable.
• Since MyRemoteShare uses the secure version of the Zoom platform, remote participants must have the Zoom app installed on their mobile device or computer in order to join a MyRemoteShare session. Participants will not be able to join just via a web browser.
• The MyRemoteShare session is limited to 45 minutes, after which the session will be terminated.
• To enable key functionality like screen share, audio and video sharing, during MyRemoteShare sessions, the user must give the following permissions to the Vscan Air app when prompted by their mobile device:
1. Access to the microphone and camera.
2. Permission to overlay (Android only).
• Annotation feature for MyRemoteShare feature on Vscan Air is available only on the Android platform. The annotation option needs to be enabled on the host side to ensure that the annotations on the remote participant side are available.
• Please refer to the below link for system and network requirements from ZOOM for MyRemoteShare feature.Official Zoom Support
• iOS devices need to enable cellular data prior to starting the MyRemoteShare session since the Wi-Fi channel will be used for communicating with the probe
Usage of MyRemoteShare
1. Swipe left to right or tap close to the battery and preset icon in the top left corner of the screen to access Presets and Menu.
2. Press Menu → Select "Start screen share session" from MyRemoteShare tab on Presets.
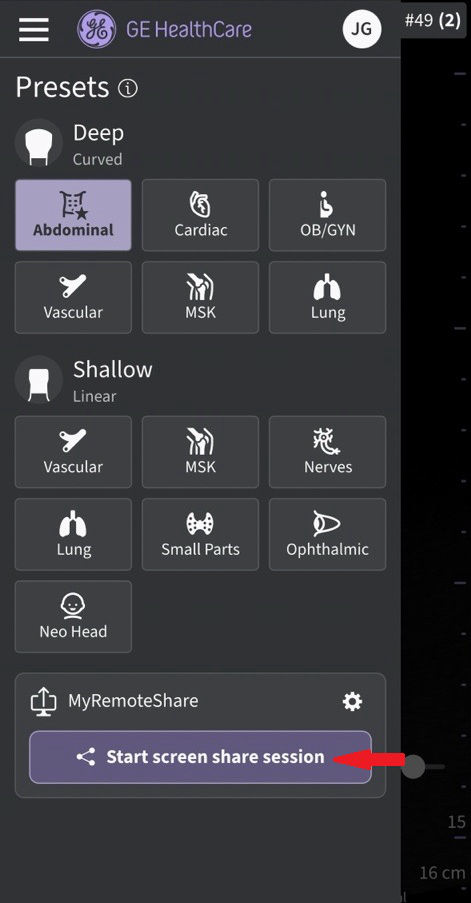
Start screen share session
3. Click on Start Session → Warning message will be displayed on the screen stating that the feature is not intended for diagnostic use. The user must Confirm to proceed.
 Warning message
4. Send the invitation link to one or more desired participants using any third-party messaging apps from the mobile device. There is also an option to copy the link if needed.
 Share/copy link to invite
5. During a session, click “Invite Participants" and send to one or more desired participants using any third-party messaging apps via mobile device.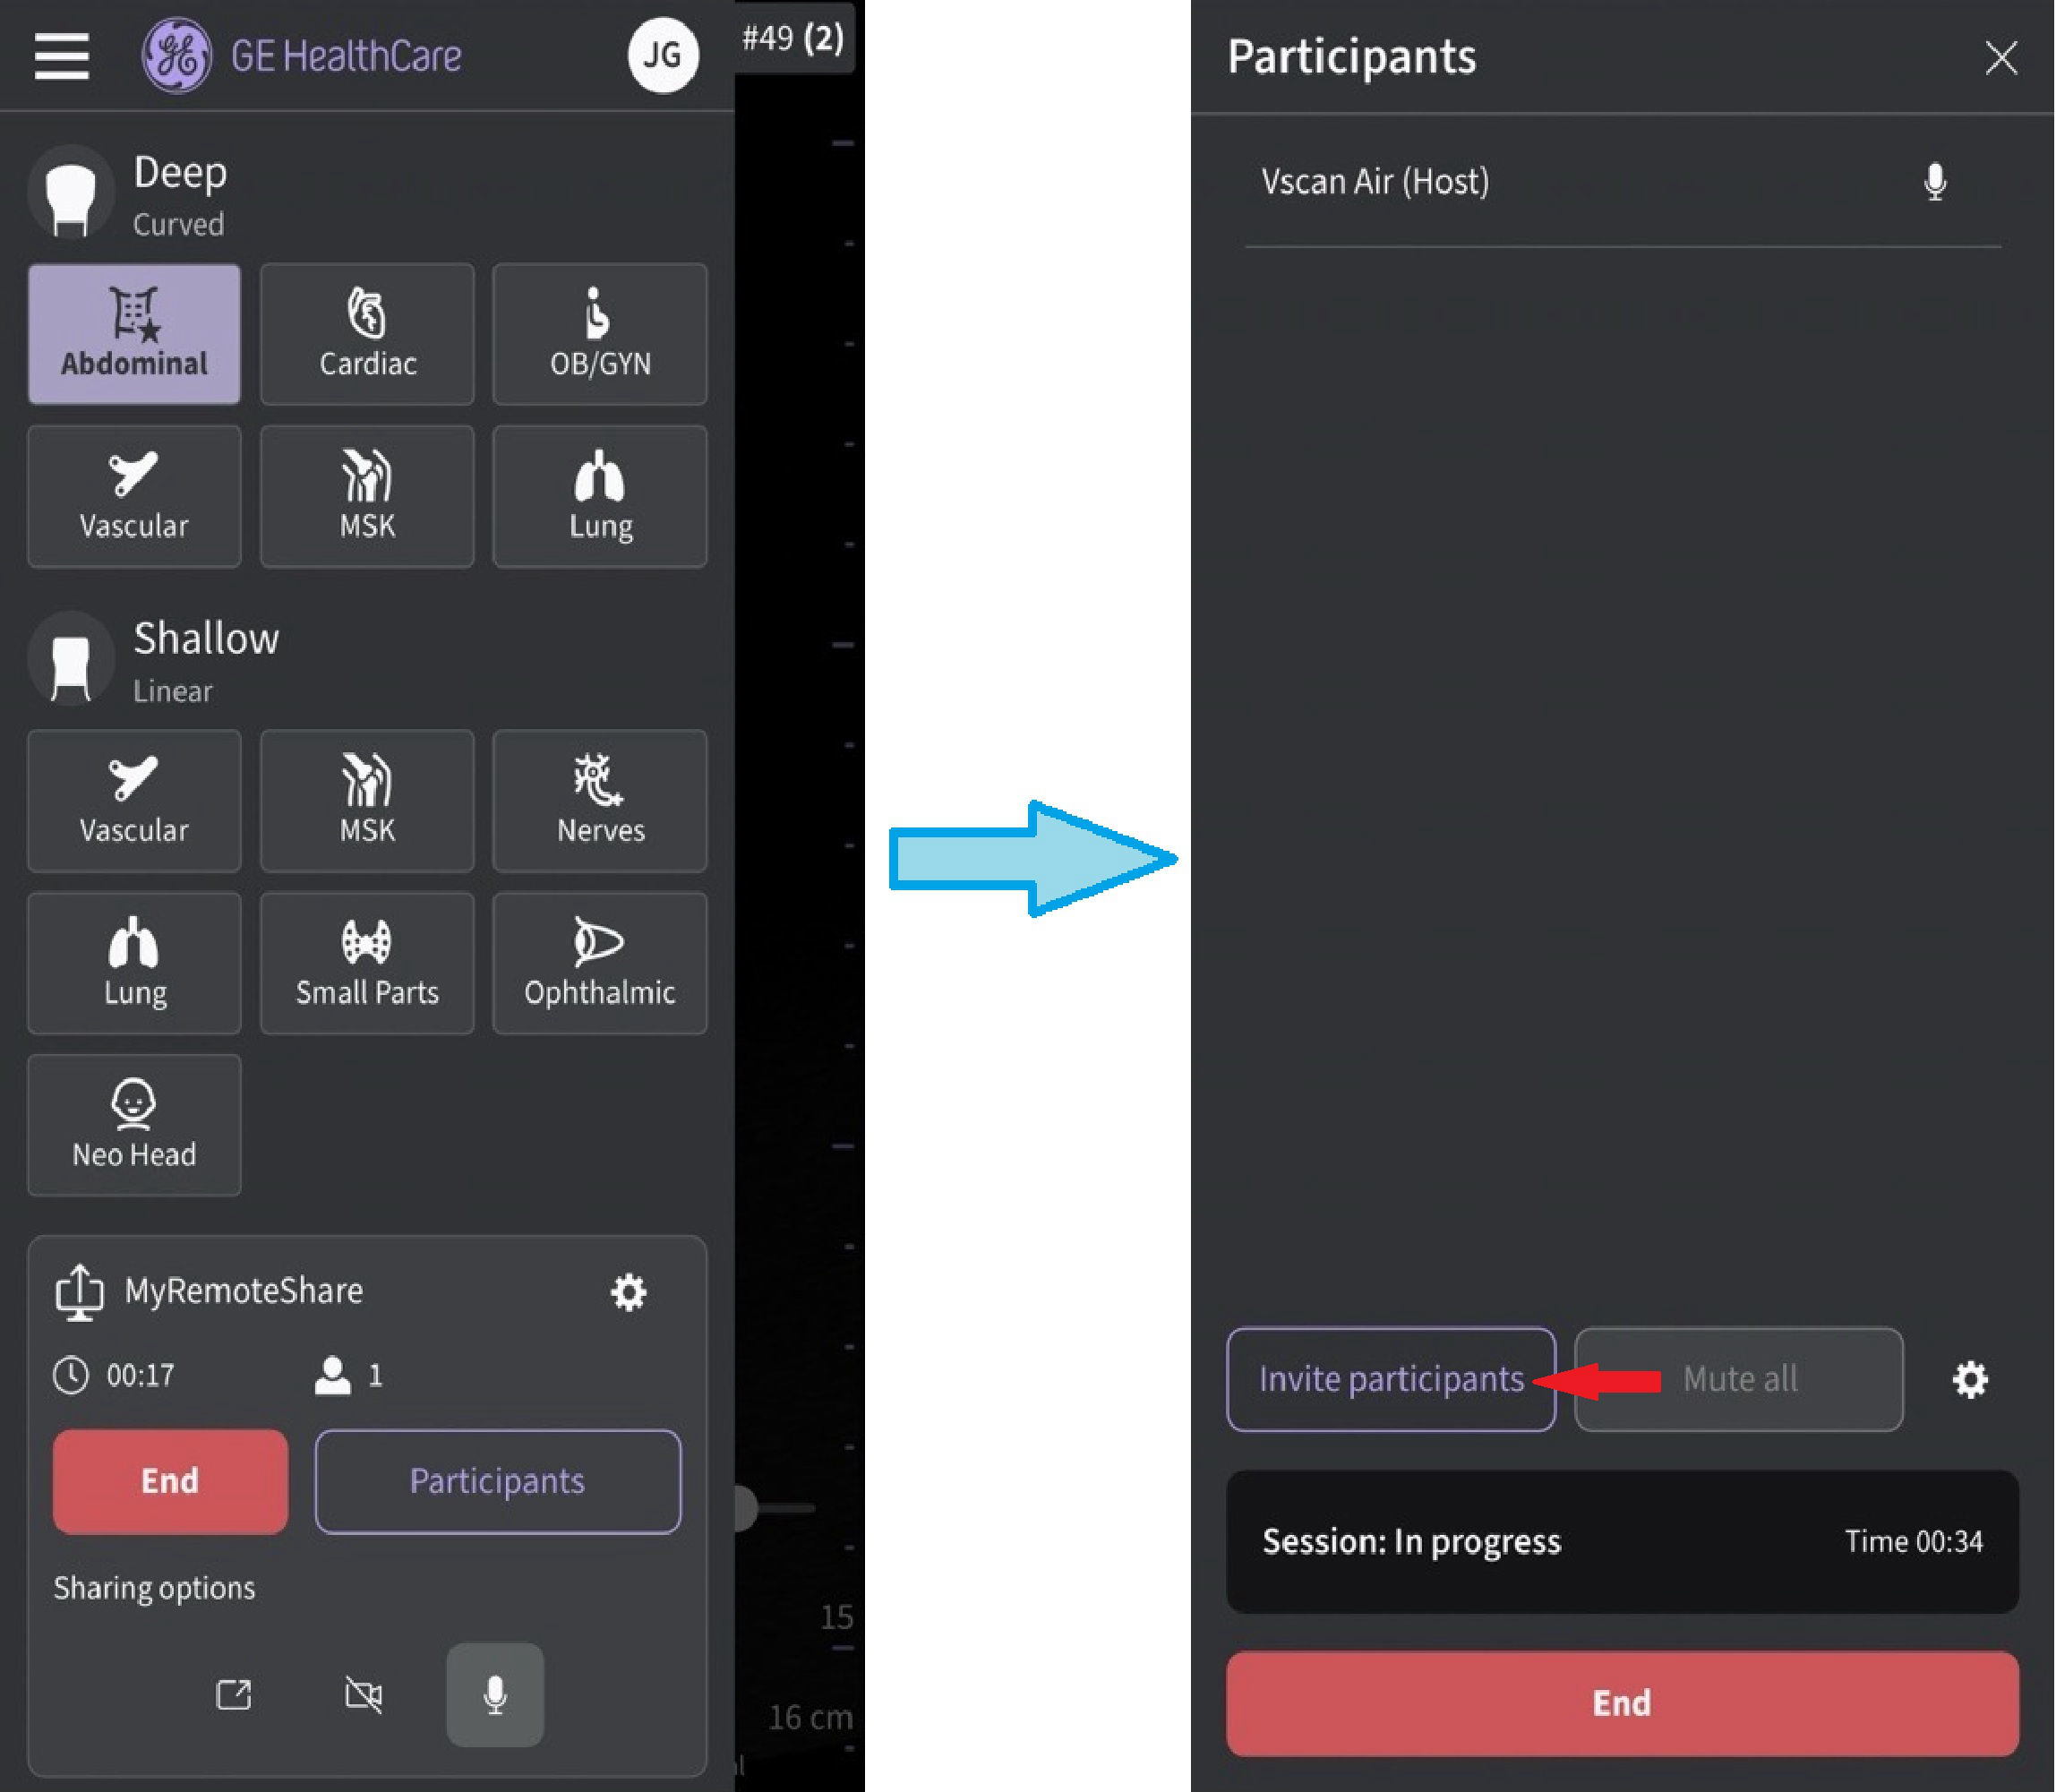
Invite participants
6. Invitation is sent to the participant(s).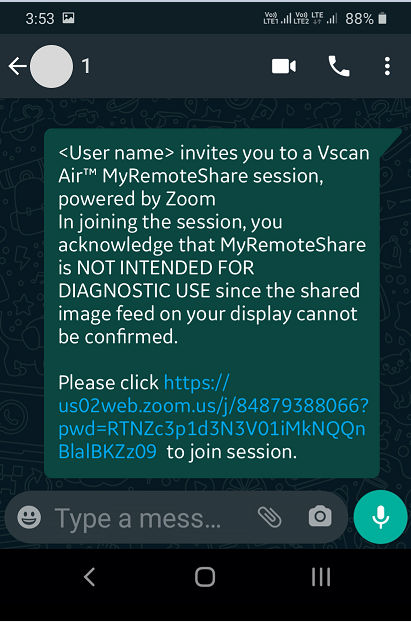
Participant invite
7. The participant(s) must click on the URL in the invitation link to join the session.
8. MyRemoteShare session is initiated.
9. On the participant side, there is a static banner throughout the screen share session which indicates that screen share is intended for non-diagnostic use.
 Non-diagnostic banner on the participant side (not a Vscan Air screen)
NOTE: The screen is a sample shot from participant side (this may vary depending on Zoom client version)10. The host can enable/disable audio/video during the remote session.
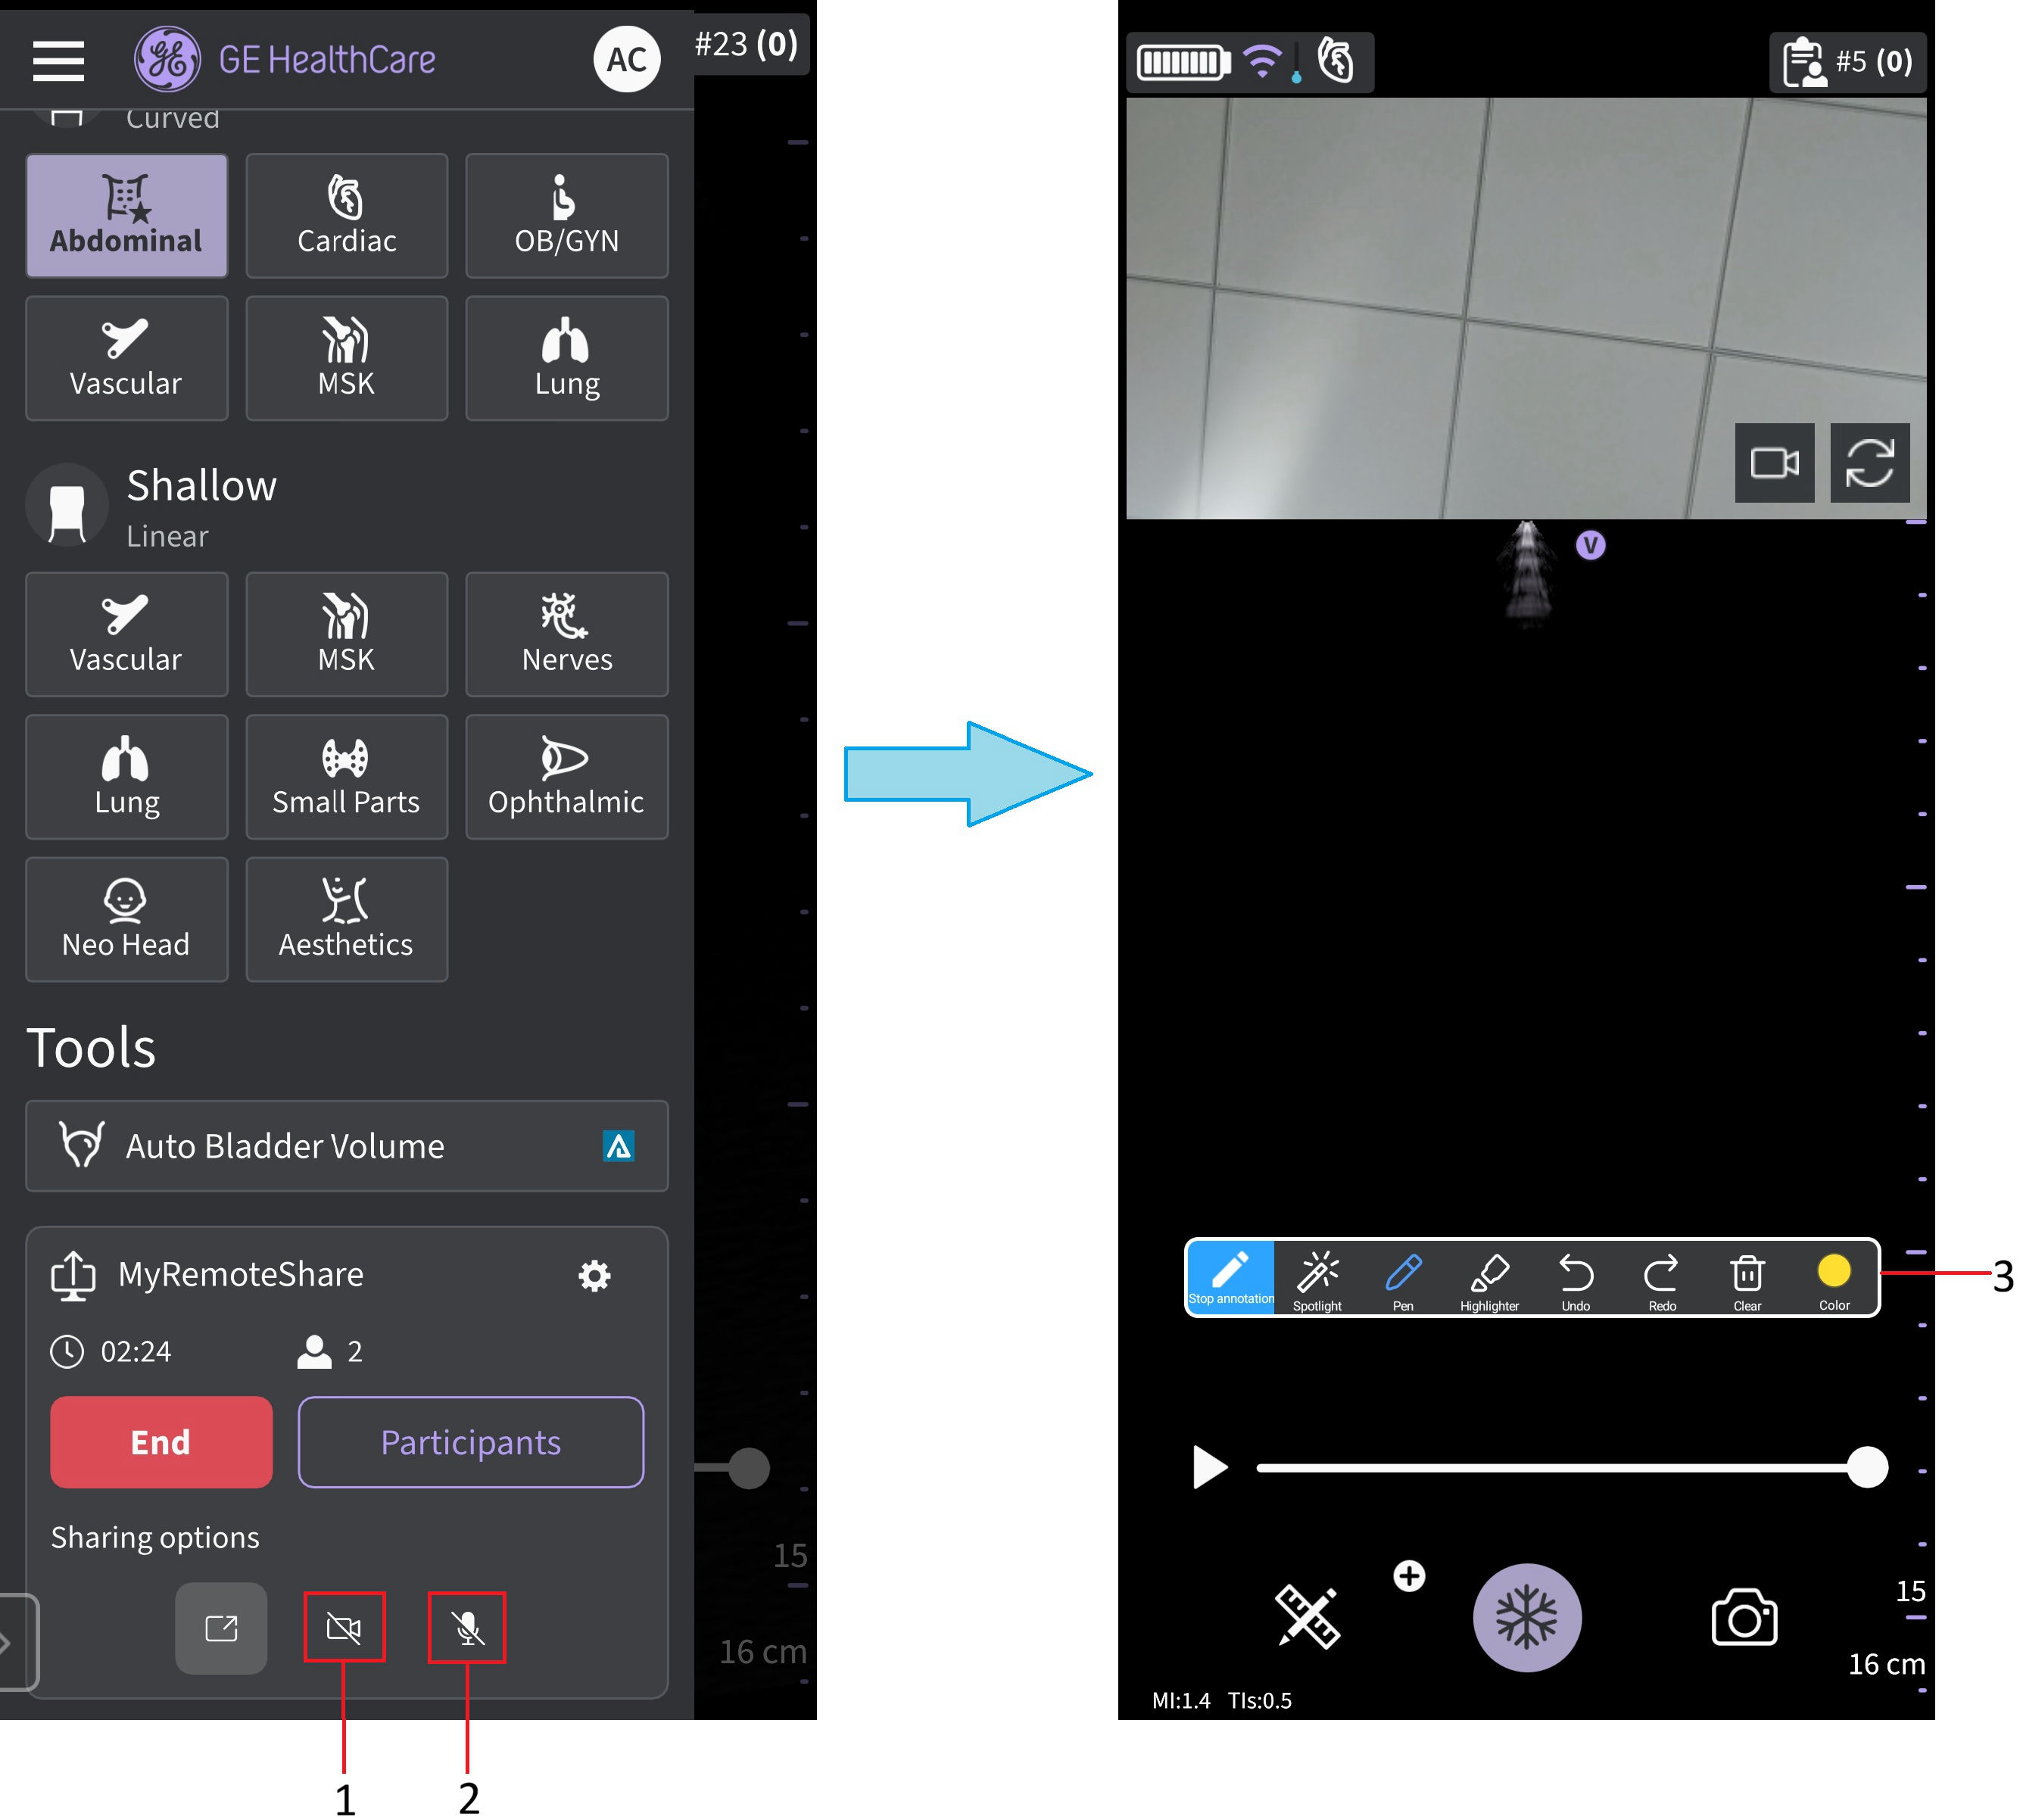
1. Enable/disable video
2. Enable/disable audio
3. Annotation bar
MyRemoteShare session
11. The host can annotate on the scan screen during the remote session (Android only).
12. The host can toggle between front and rear camera feed during the remote session.
Click on icon 1 below to open participant camera.
Click on icon 2 below to rotate camera feed.
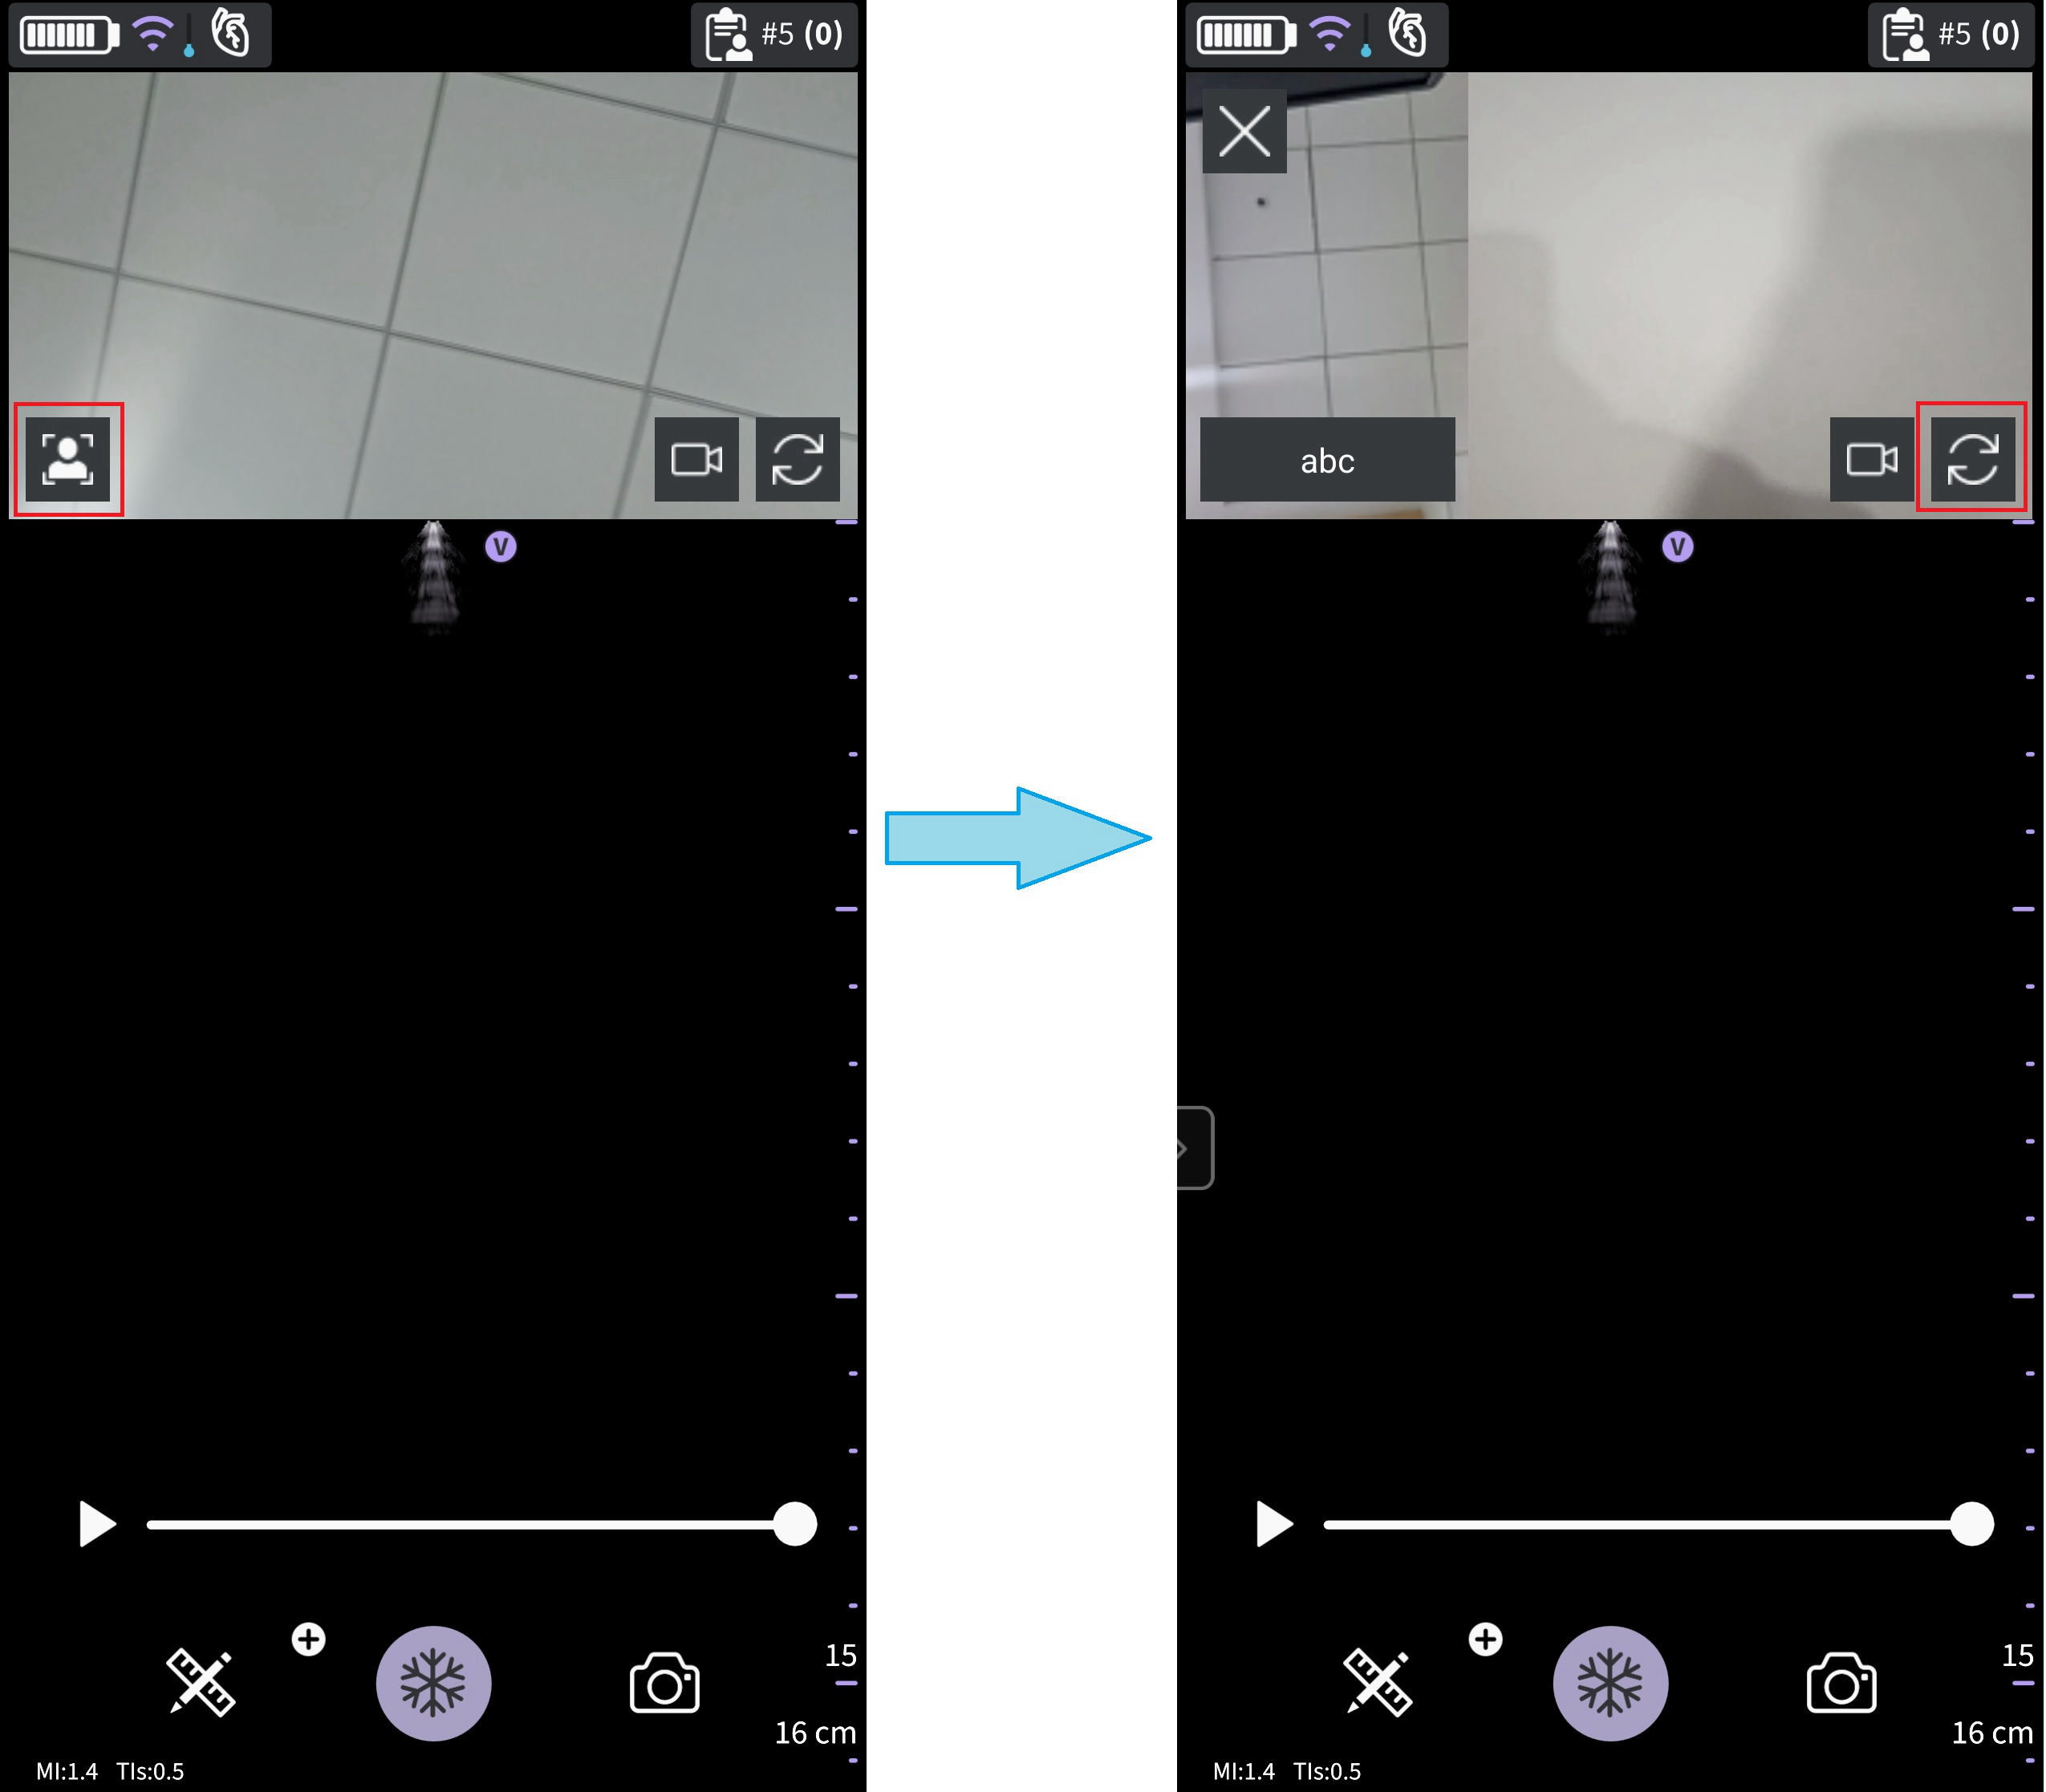
Front and rear camera feed
13. The host can add/remove participant(s) during the remote session via the menu accessed by swiping in the left panel
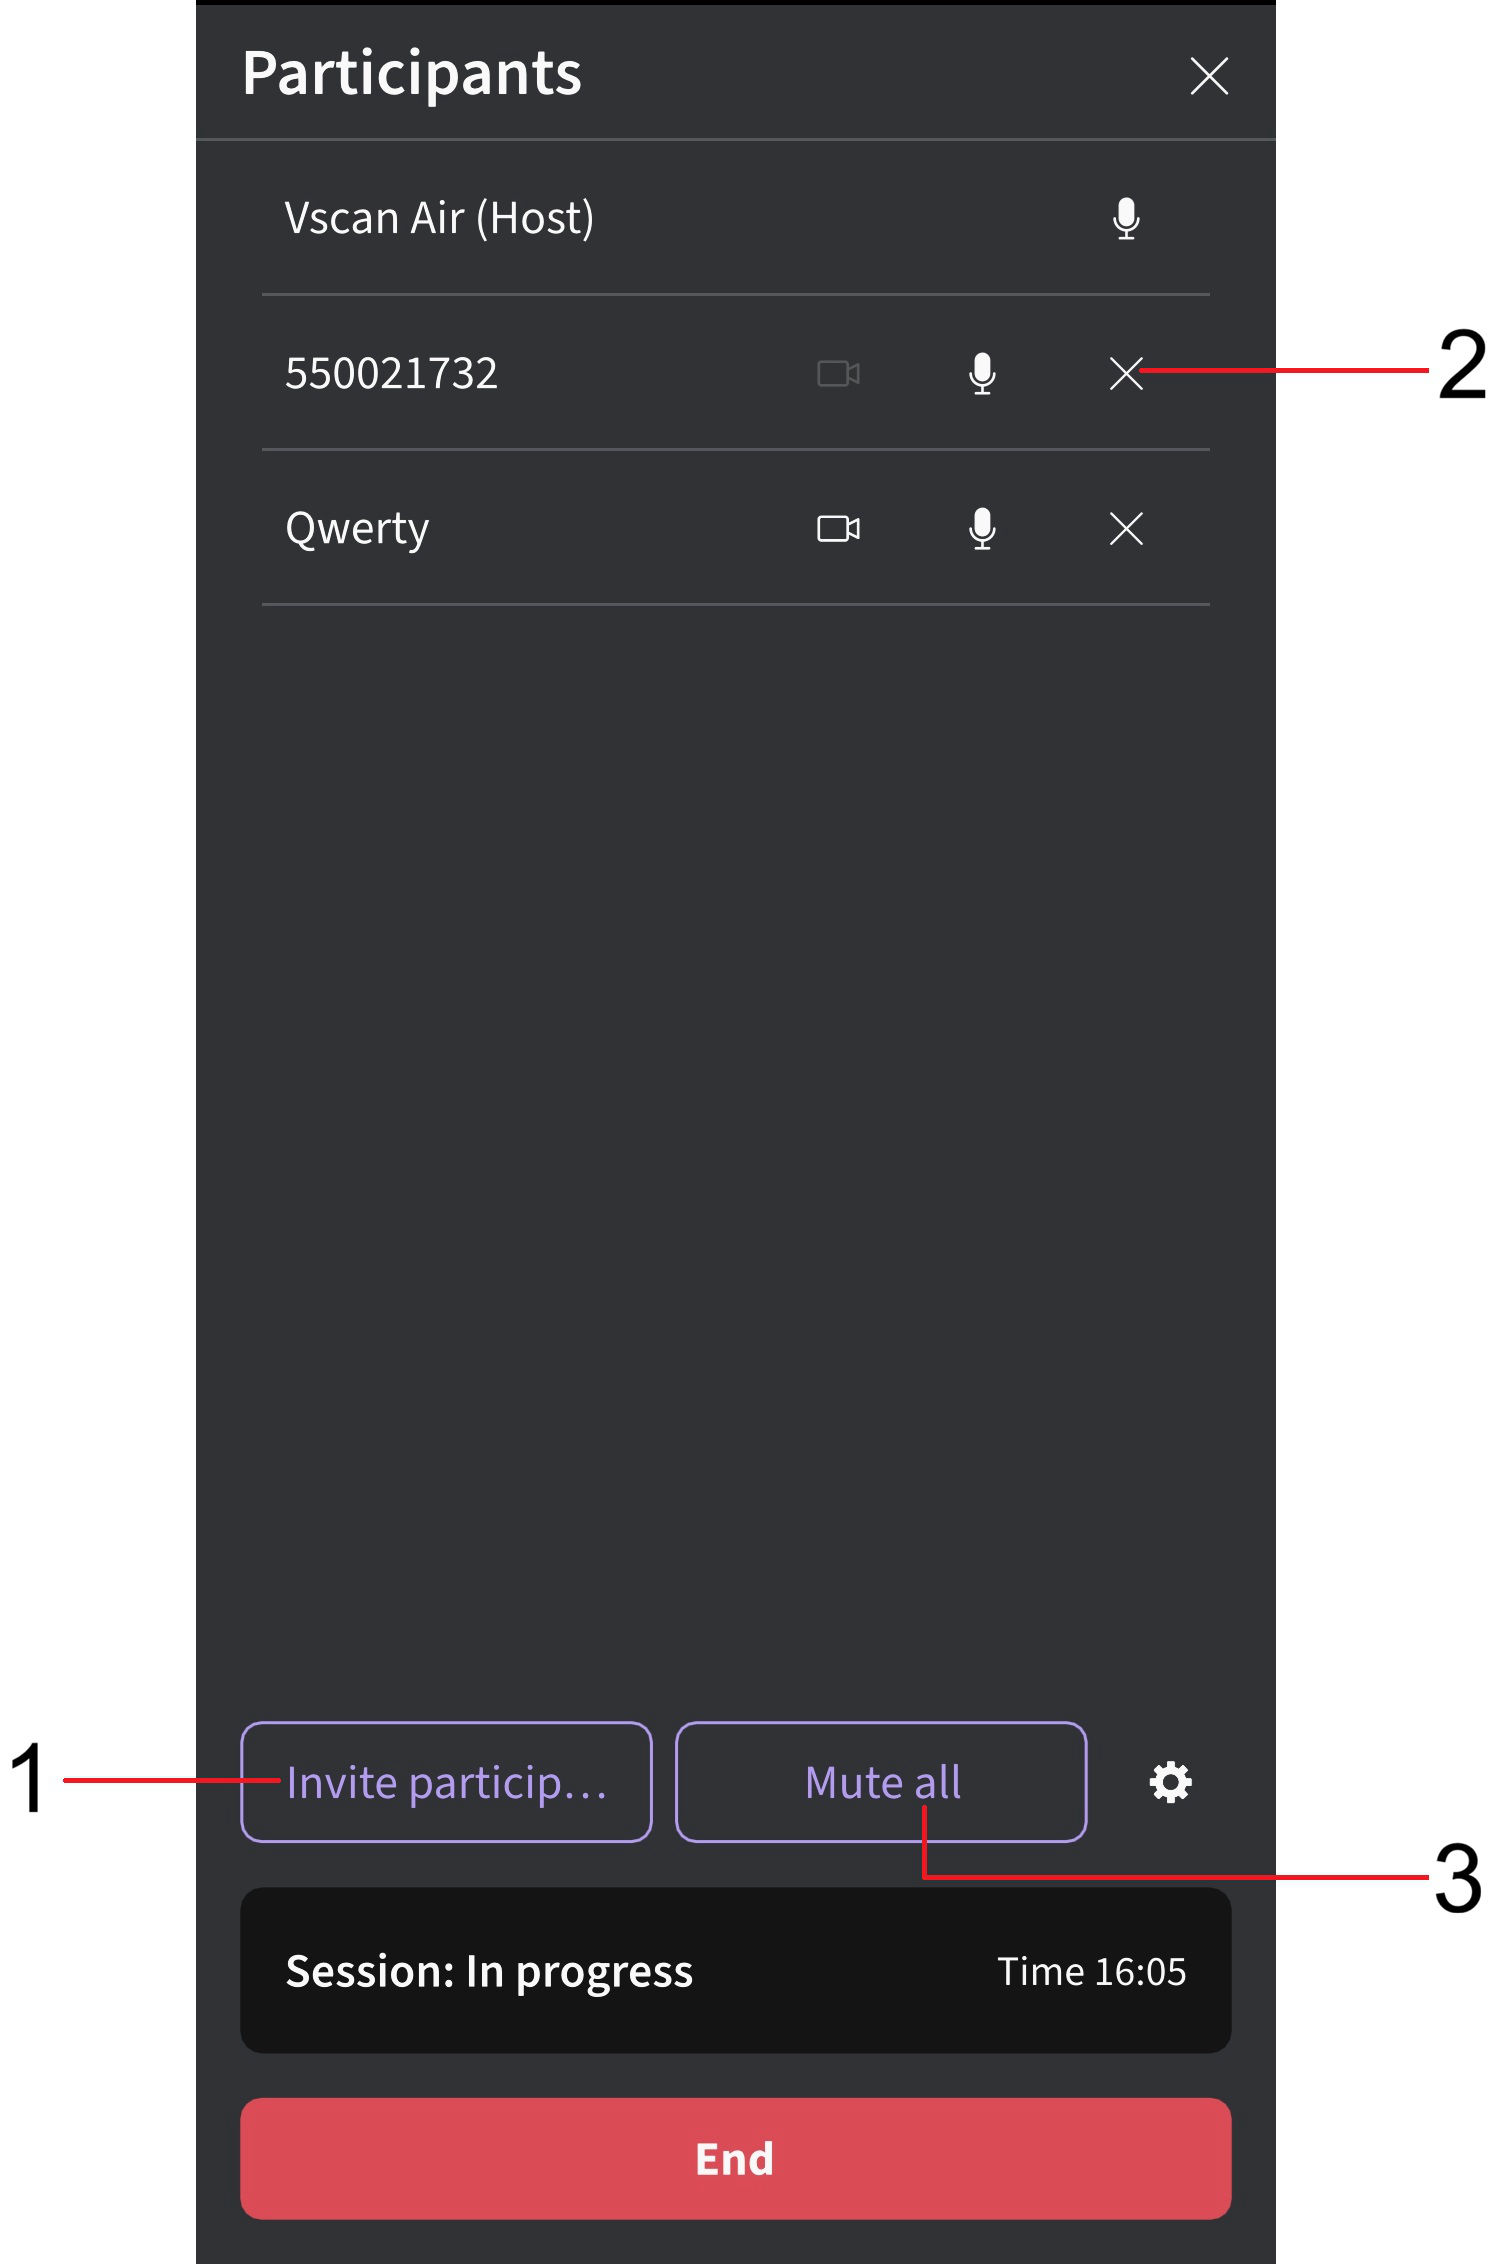
Add/Remove participants
1. Add participant
2. Remove client (participant)
3. Mute all (other than Host)
14. The host can end the remote session.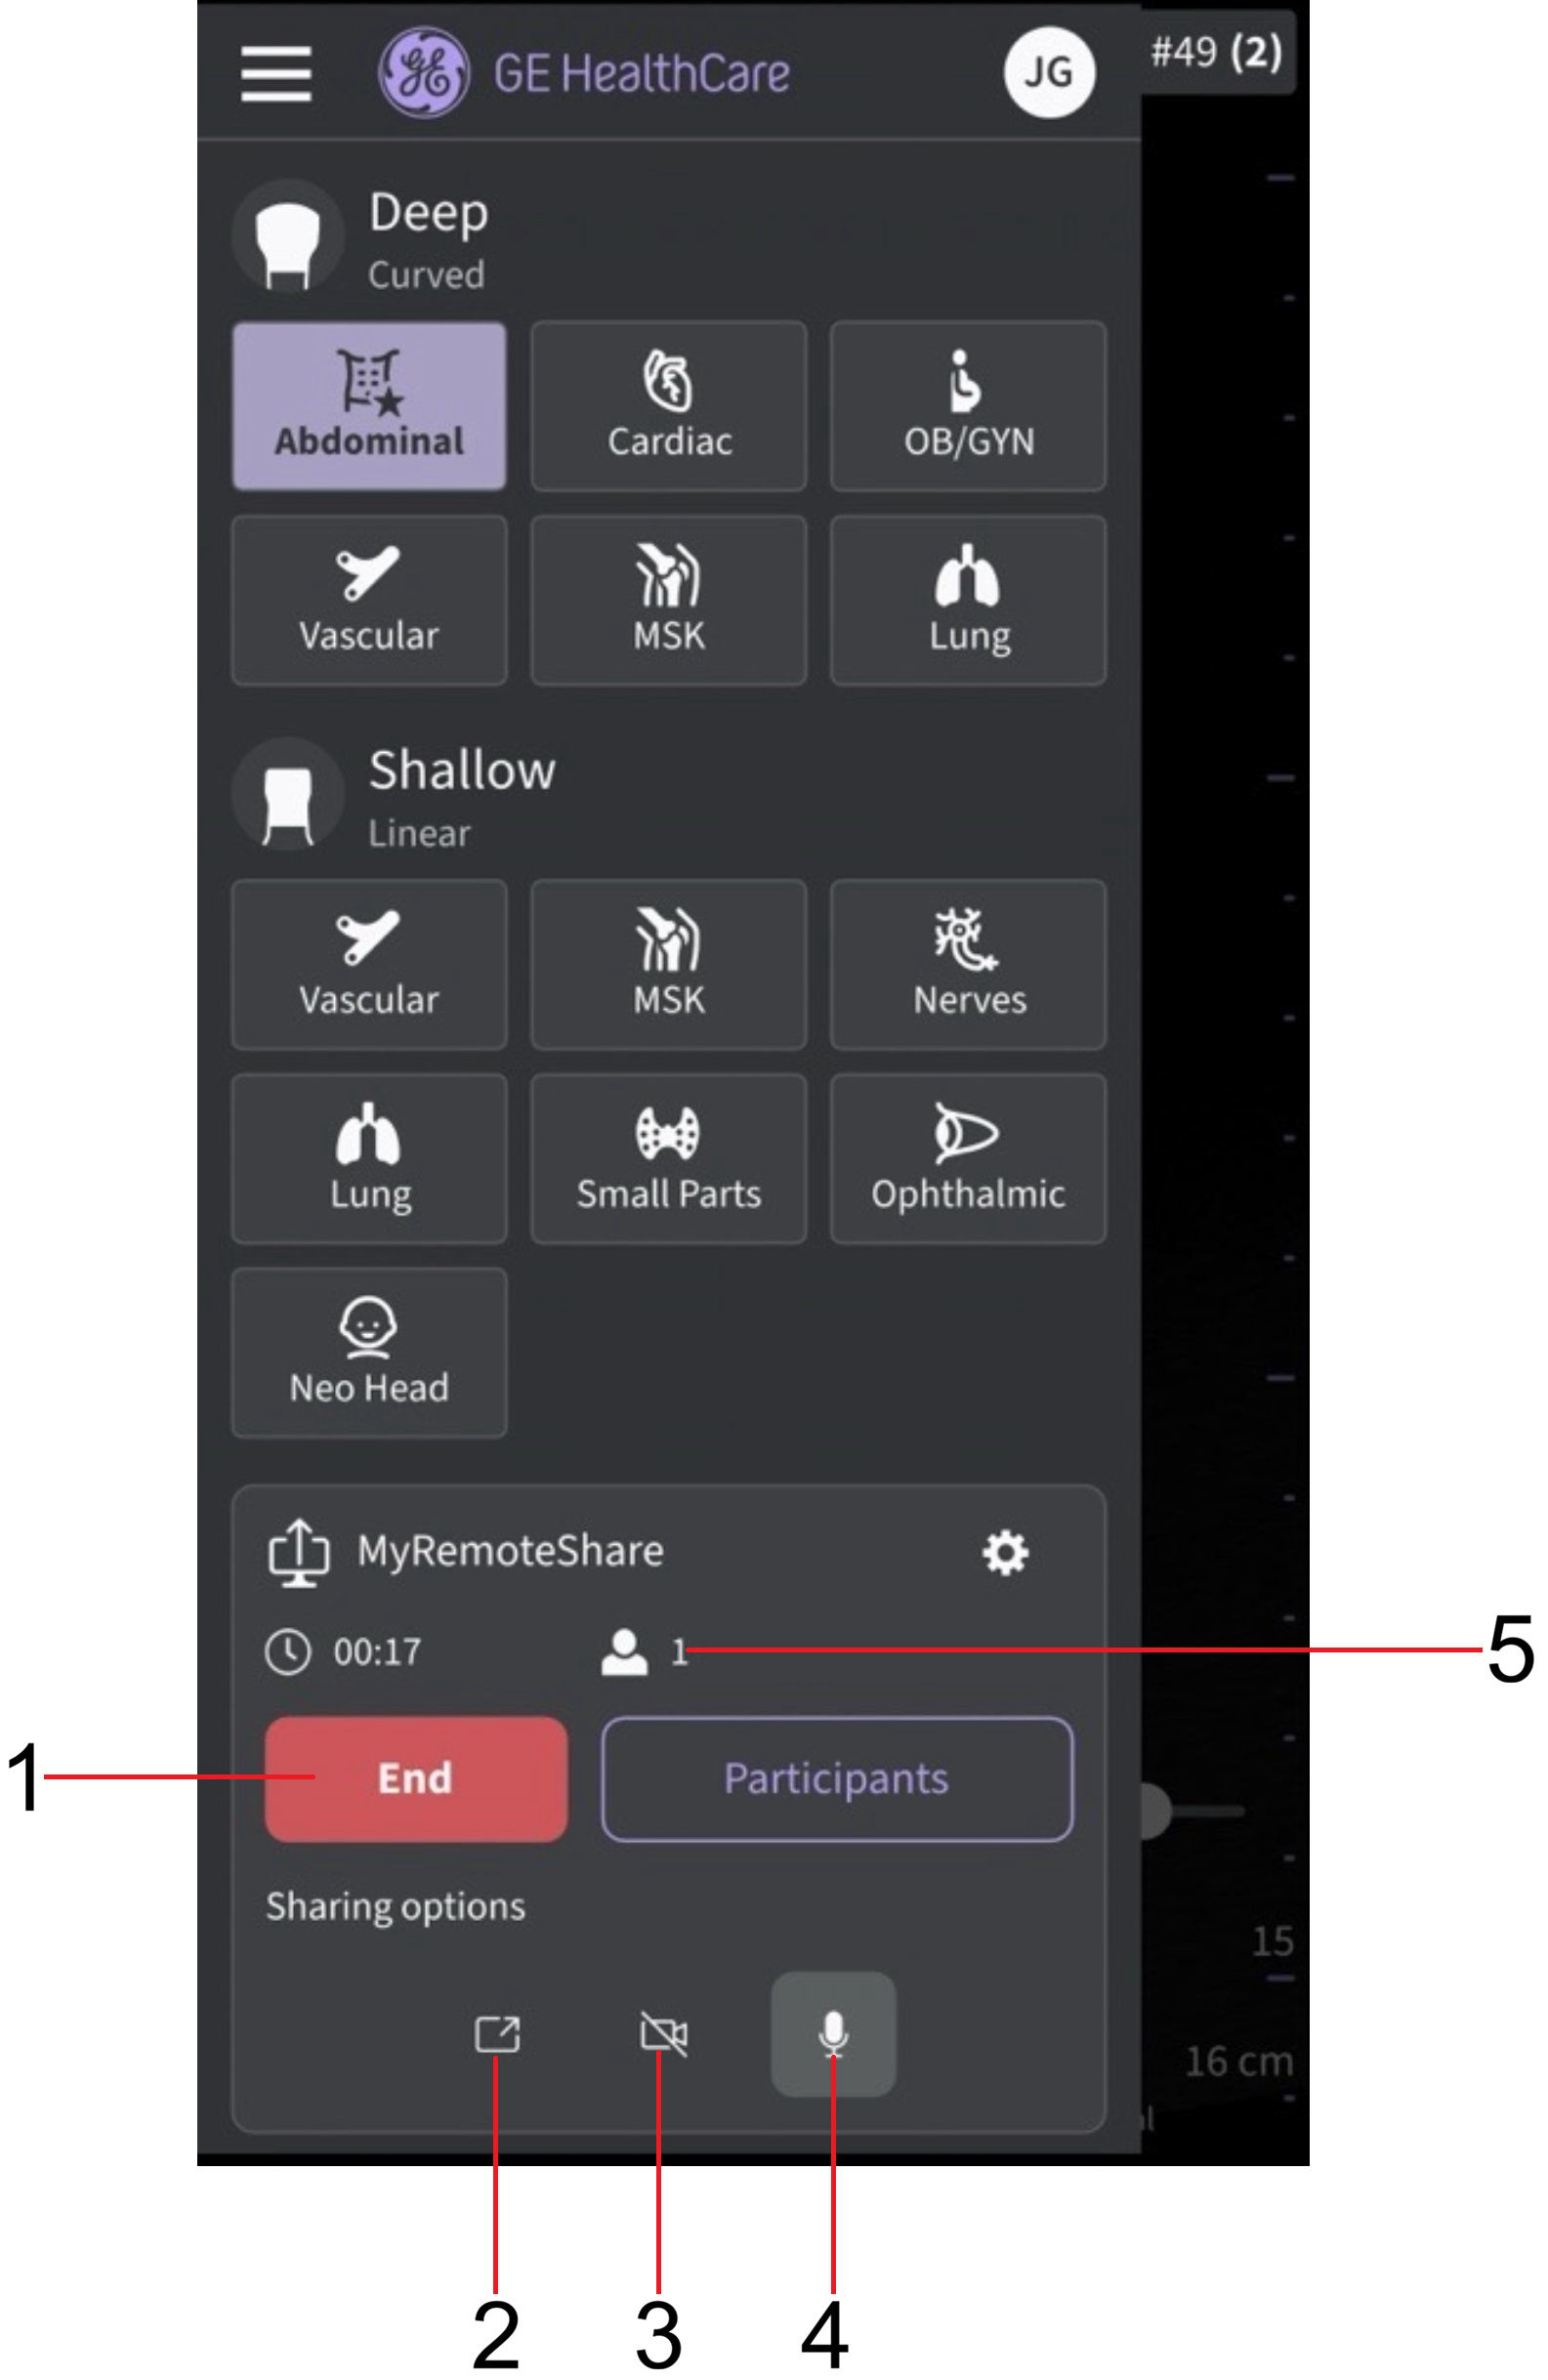
1. End call
2. Toggle screensharing on/off
3. Toggle Host camera on/off
4. Mute Host
5. Session duration and number of participants
15. Settings and preferences for MyRemoteShare can be configured by clicking on the Settings button on the MyRemoteShare tab. The available settings include a choice to allow participants to join automatically or approve each one, as well as choices for the camera and microphone to be on or off when starting a session. Note that screen sharing is enabled by default when starting a MyRemoteShare session.
 MyRemoteShare Settings configuration
Disclaimer: The information herein is not intended to replace the product’s User Manual. Please consult the User Manual for comprehensive information and cautionary guidance about the product’s operation and use.