Assign Patient Data Manually To The Current Exam
To assign patient details manually to the current exam in Vscan Air application, follow the procedure below.
1. Swipe from right to left (or) Tap the Exams icon in the top right corner of the screen
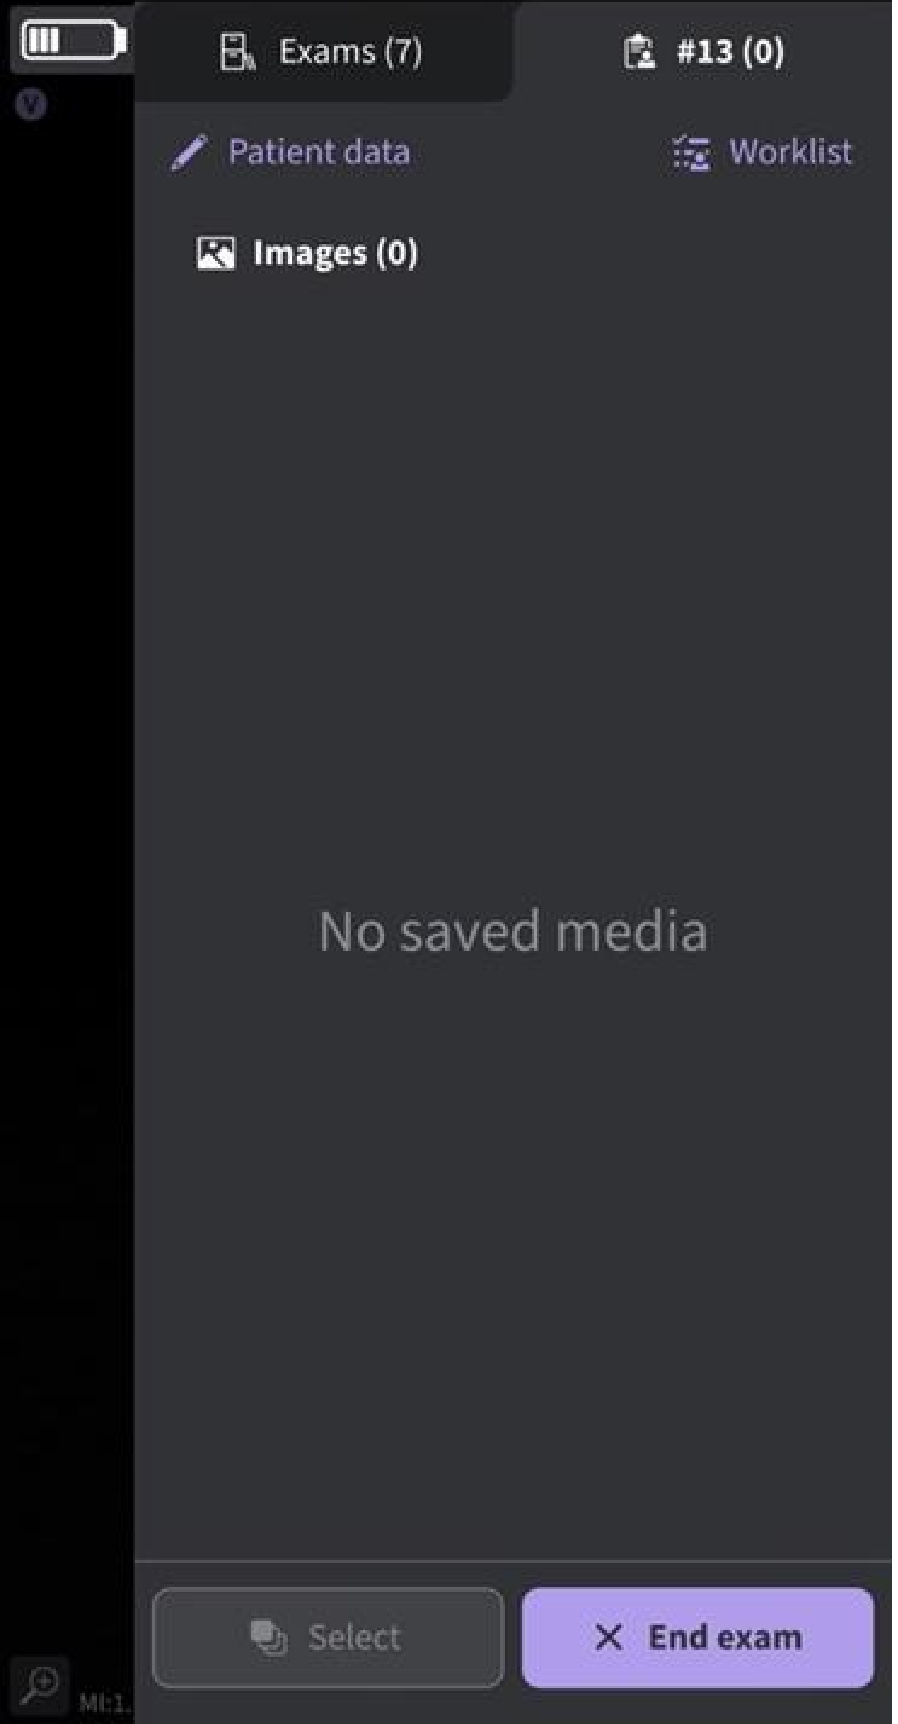 Current Exam
NOTE: Patient data can be assigned to an individual exam only. The Patient data cannot be assigned to more than one exam simultaneously.
2. Press “Edit Patient” and enter the required exam information in the respective fields. The Study Description field is editable and has a 64-character limit. Press "Save" button to assign data to the current exam. After saving data successfully the application takes you to the scan screen.
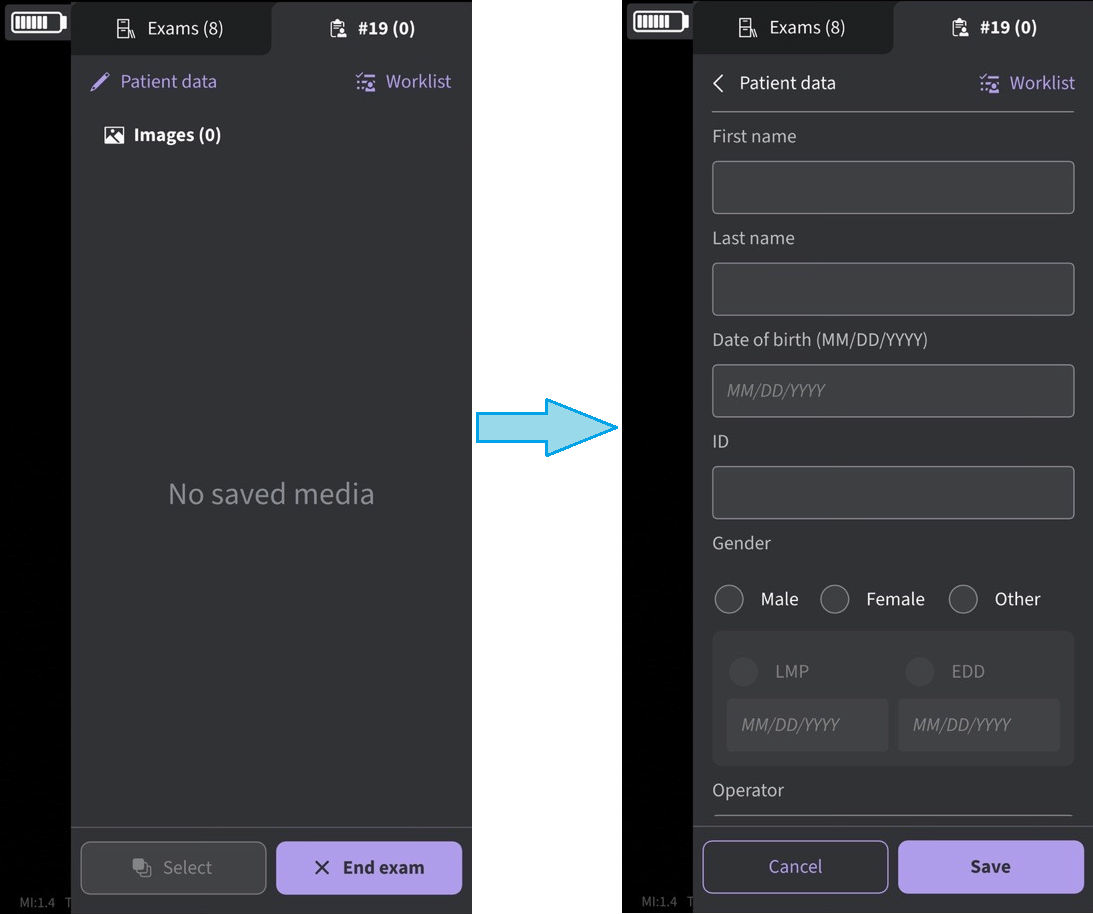
Edit Patient data - Current Exam
NOTE:
• Be aware that the Operator's Name field is filled with the text before the @ symbol of the email ID of the logged in user as the default value.
• Once an export of exam images/videos has been initiated, the patient details assigned to that
particular exam cannot be edited in the app.
3. Patient’s Last Name, First Name and ID are shown on the scan screen header.
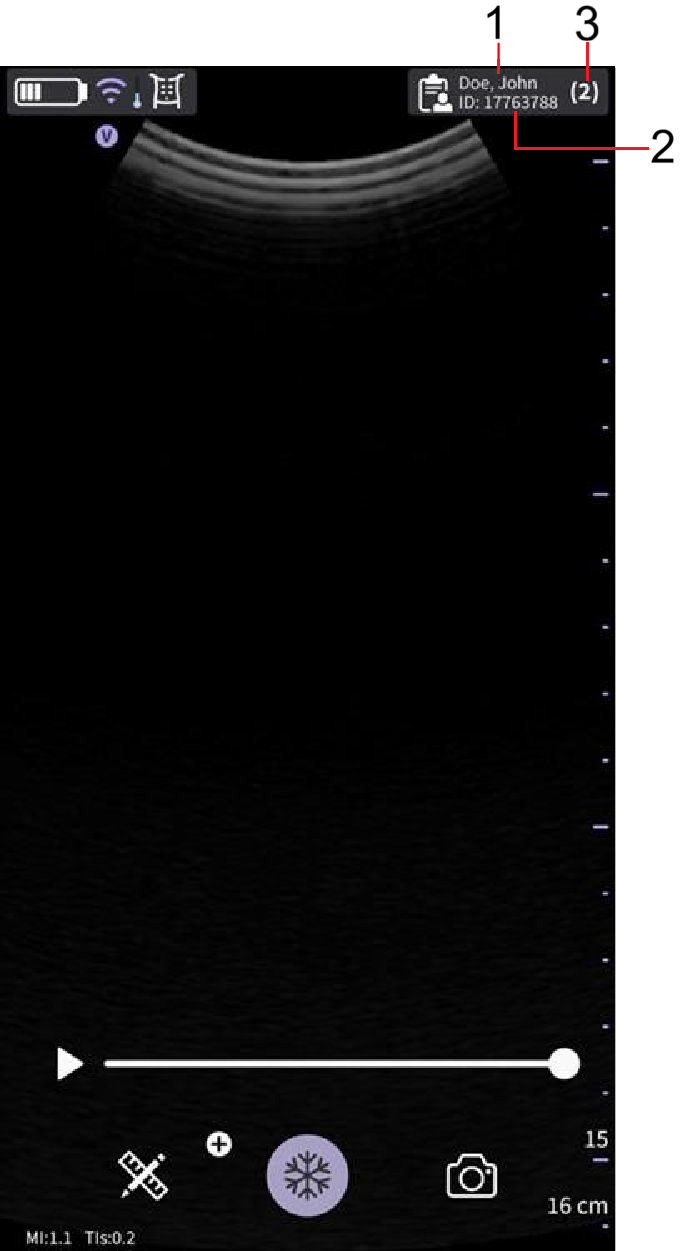 Scan Screen with Patient data
1. Patient last name and first name
2. Patient ID
3. Number of images/videos stored in current exam
4. Select the Exams tab to view the images/videos under current exam.
Assign patient data manually to an existing exam
To assign patient details manually to an existing exam in Vscan Air application, follow the procedure below.
1. Swipe from right to left (or) Press Exam icon in the top right corner of the screen
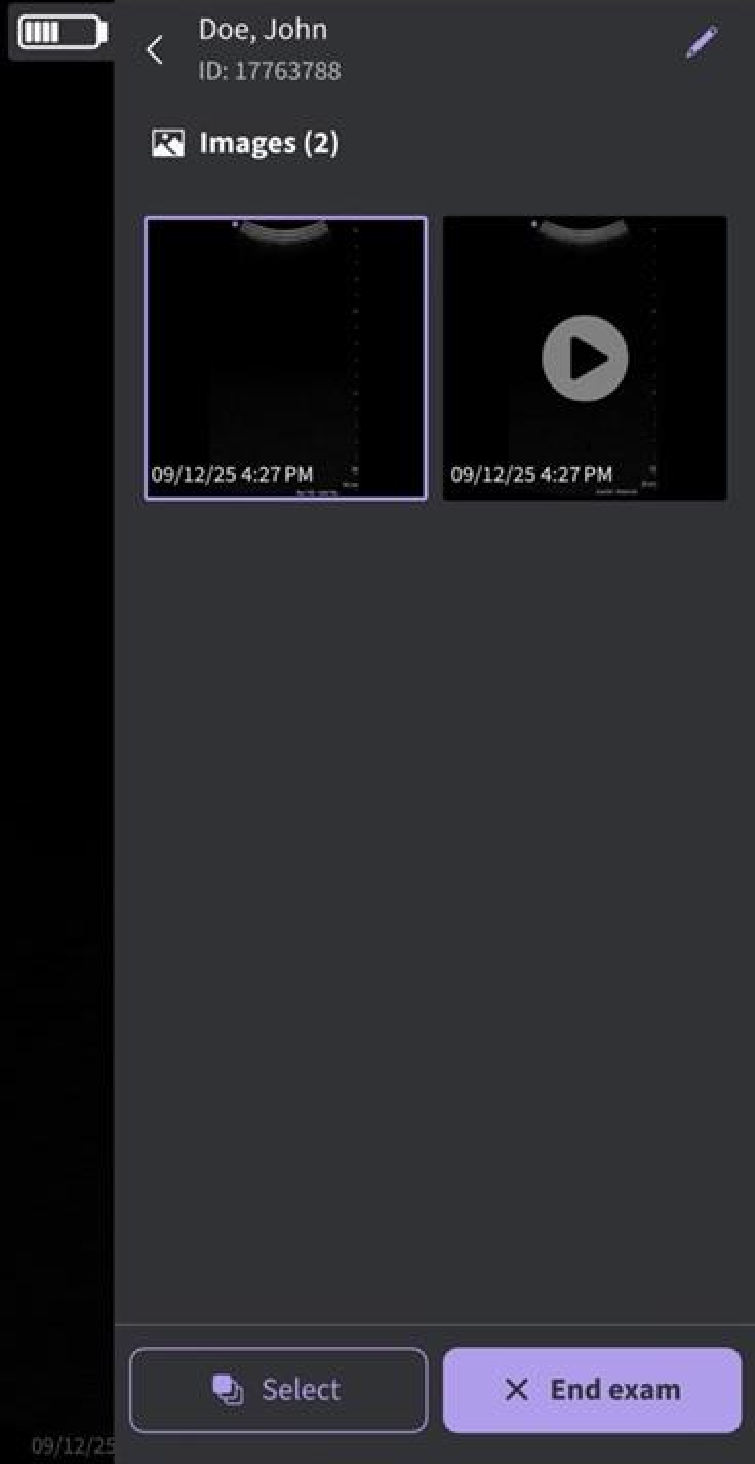
Exam holding one image and one video
2. Press Exams tab.
Select an Exam and assign Patient data. 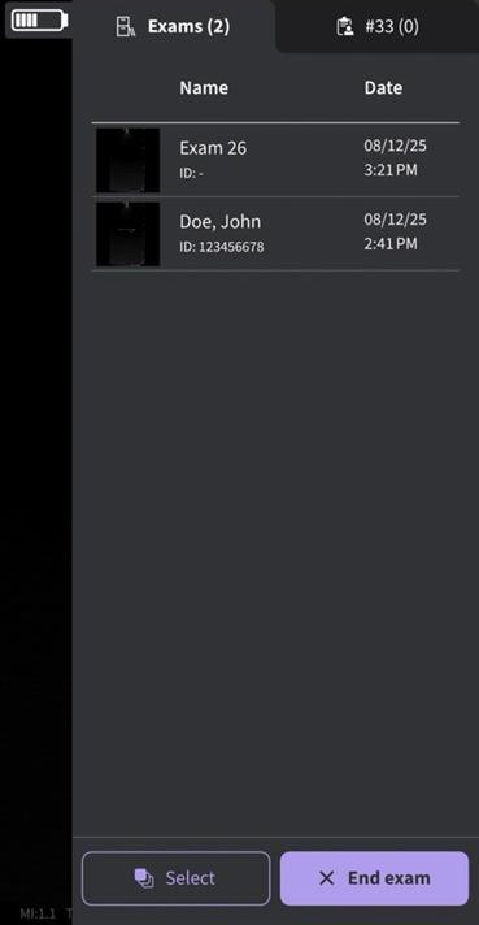 Exam Tab
NOTE: Patient data can be assigned to an individual exam only. The Patient data cannot be assigned to more than one exam simultaneously.3. Press “Edit Patient” button at top right corner and enter the required information in the respective fields under “Patient data” screen. The Study Description field has a 64-character limit
Press "Save" button to assign Patient data to the existing exam. After successful assignment of Patient data, application takes you to the scan screen.
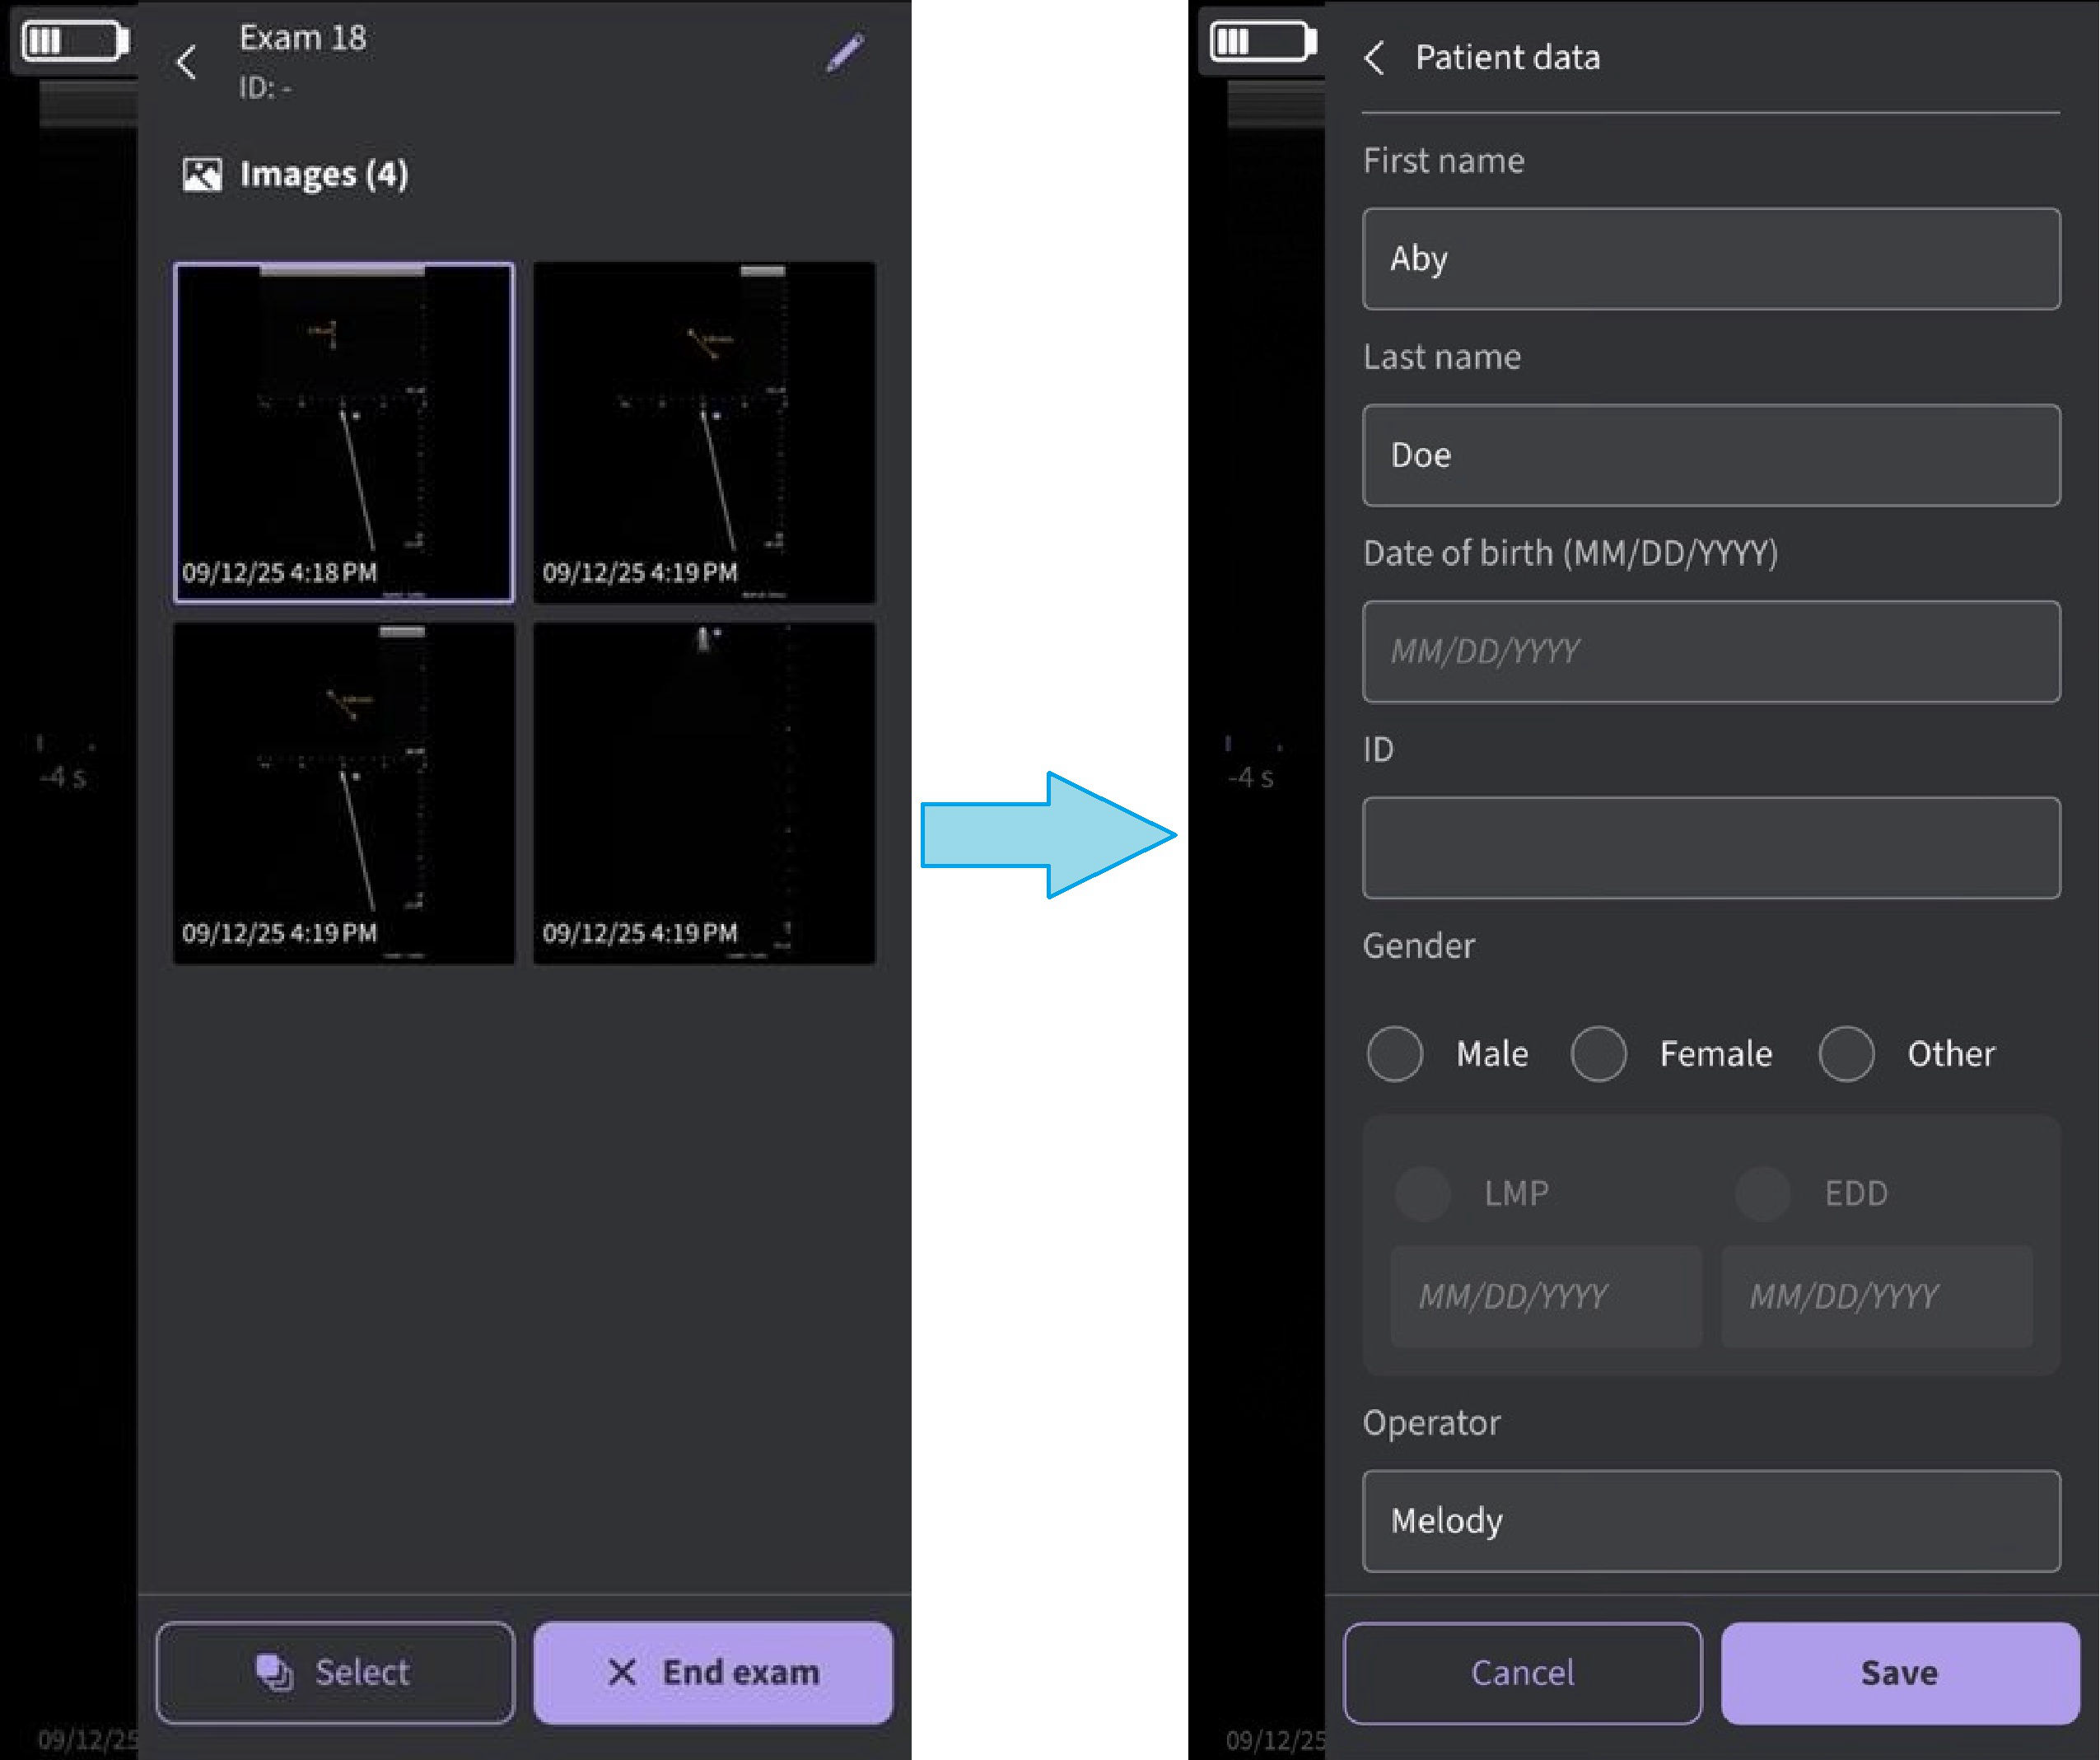
Edit Exam
NOTE:
• Be aware that the Operator's Name field is filled with the text before the @ symbol of the email ID of the logged in user as the default value.
• Once an export of exam images/videos has been initiated, the patient details assigned to that
particular exam cannot be edited in the app.
4. Patient’s Last Name, First Name and ID are shown on the top of the scan screen.
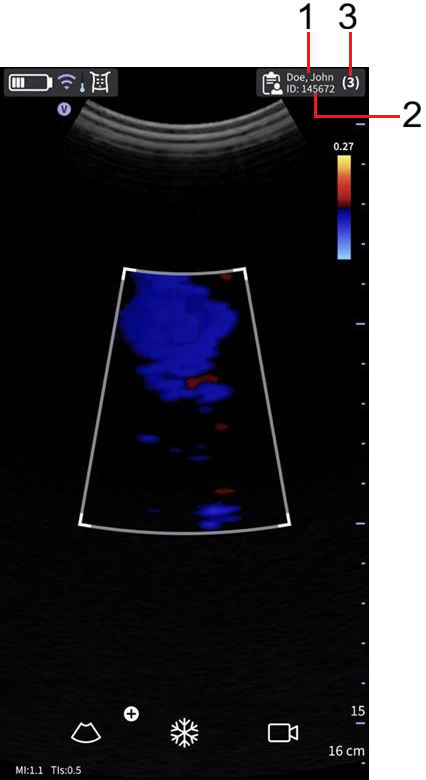
Scan Screen with Patient data
1. Patient Last name and first name
2. Patient ID
3. Number of images/videos stored in the exam being reviewed
5. Select Exams tab to view the images/videos under the existing exam.
Disclaimer: The information herein is not intended to replace the product’s User Manual. Please consult the User Manual for comprehensive information and cautionary guidance about the product’s operation and use.