Vscan Air can download and refresh a DICOM modality worklist. An exam can be linked to an existing patient pulled from the worklist, prior to exporting to the DICOM image server.
To assign Patient data from a modality worklist server to the current exam in the Vscan Air application, follow the procedure below.
1. Swipe from right to left (or) Press Exams icon on the top right corner.

Exams tab
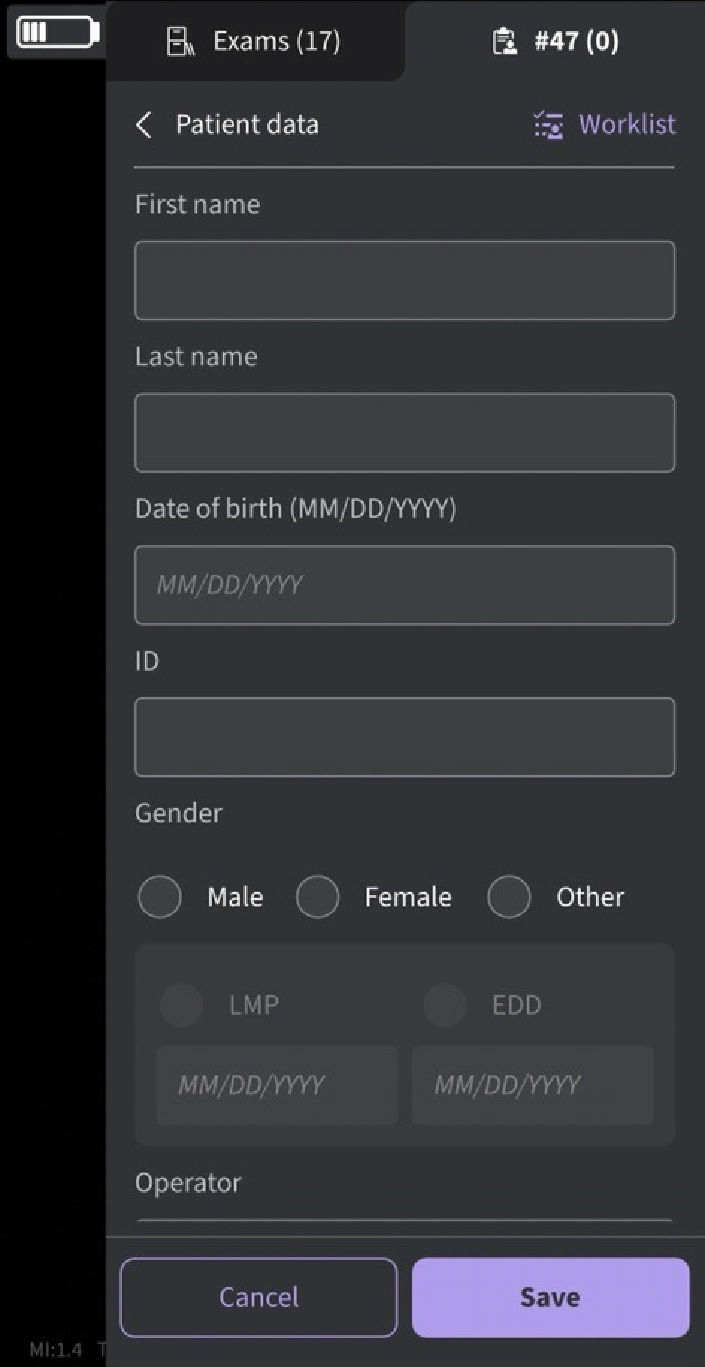
NOTE: Patient data can be assigned to an individual exam only. The Patient data cannot be assigned to more than one exam simultaneously.2. Press “Edit Patient” and then Press the ![]() symbol at top right corner of “Patient data” screen.
symbol at top right corner of “Patient data” screen.
Edit Patient data
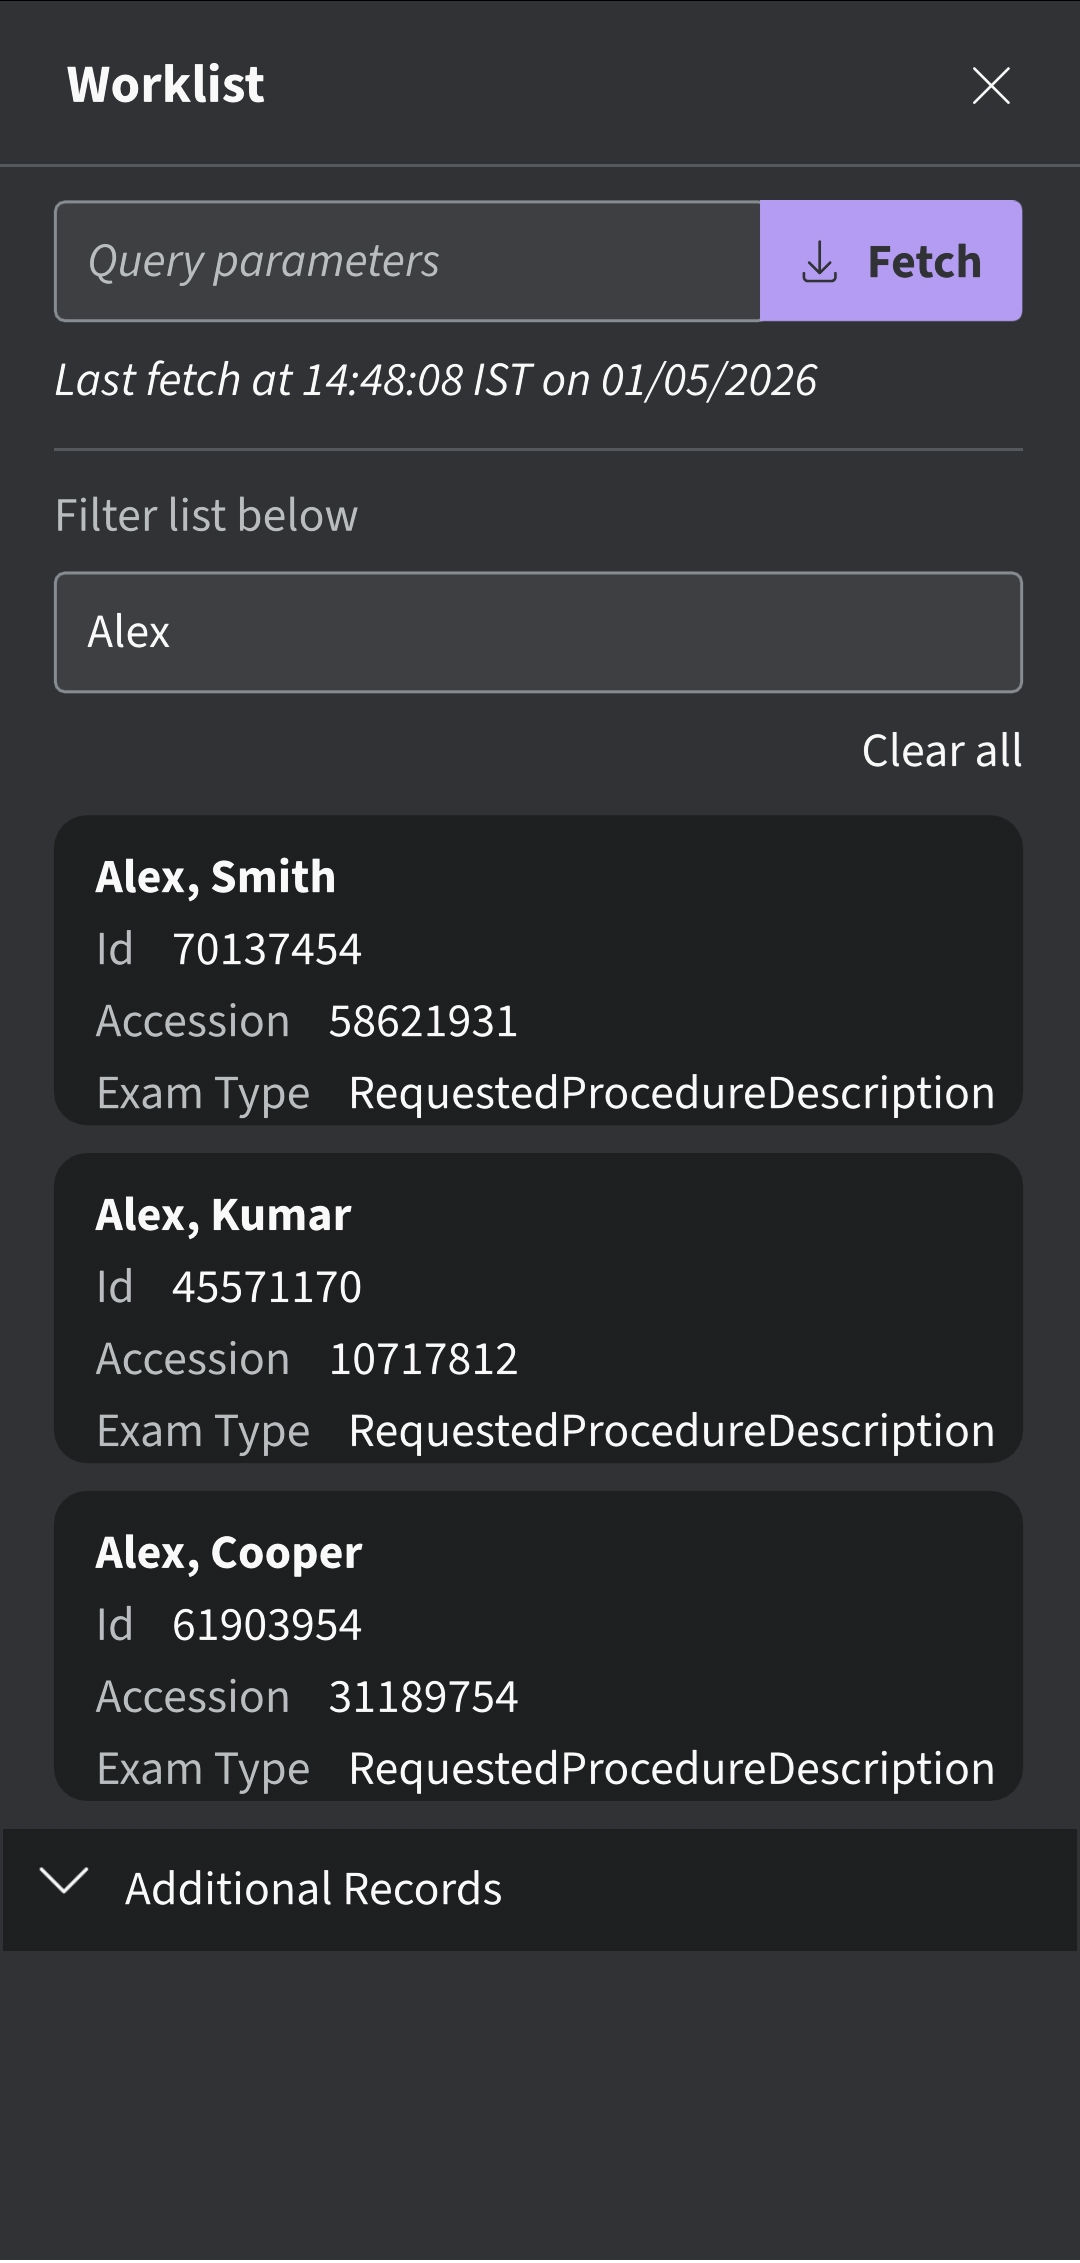
NOTE: Be aware that the Operator's Name field is filled with the text before the @ symbol of the email ID of the logged in user as the default value.3. Press the refresh button on the “Worklist” screen to import the list of patients from Modality Worklist Server. Patient data can be added to current exam in one of the following ways:
a. Tap on the desired Patient Name/Patient ID from the imported list of patients OR
b. Make a local search to find the details of a particular patient from the imported list of patients - by entering Patient Name/Patient ID in the “Filter” field on the screen OR
c. Make a remote search to find the details of a particular patient from selected Modality Worklist Server – by entering Patient ID in the “Patient Query” field on the screen.

Search Patient
NOTE:
When a remote search is initiated, only the records matching the search criteria will be displayed on the screen.
If user moves away from the worklist screen and comes back, the worklist screen will display the imported list of records and clears the remote search results.
NOTE:
• Make sure that the display device hosting Vscan Air app and the PC in which server is configured are
connected to same network.
• When you refresh the patient details in “worklist” screen, the connection between Vscan Air Probe and
display device may be temporarily interrupted.
• For any patient, if details are missing in Modality Worklist server, import of those patient records will be
rejected in the application and it will be displayed in the patient list as “Rejected”.
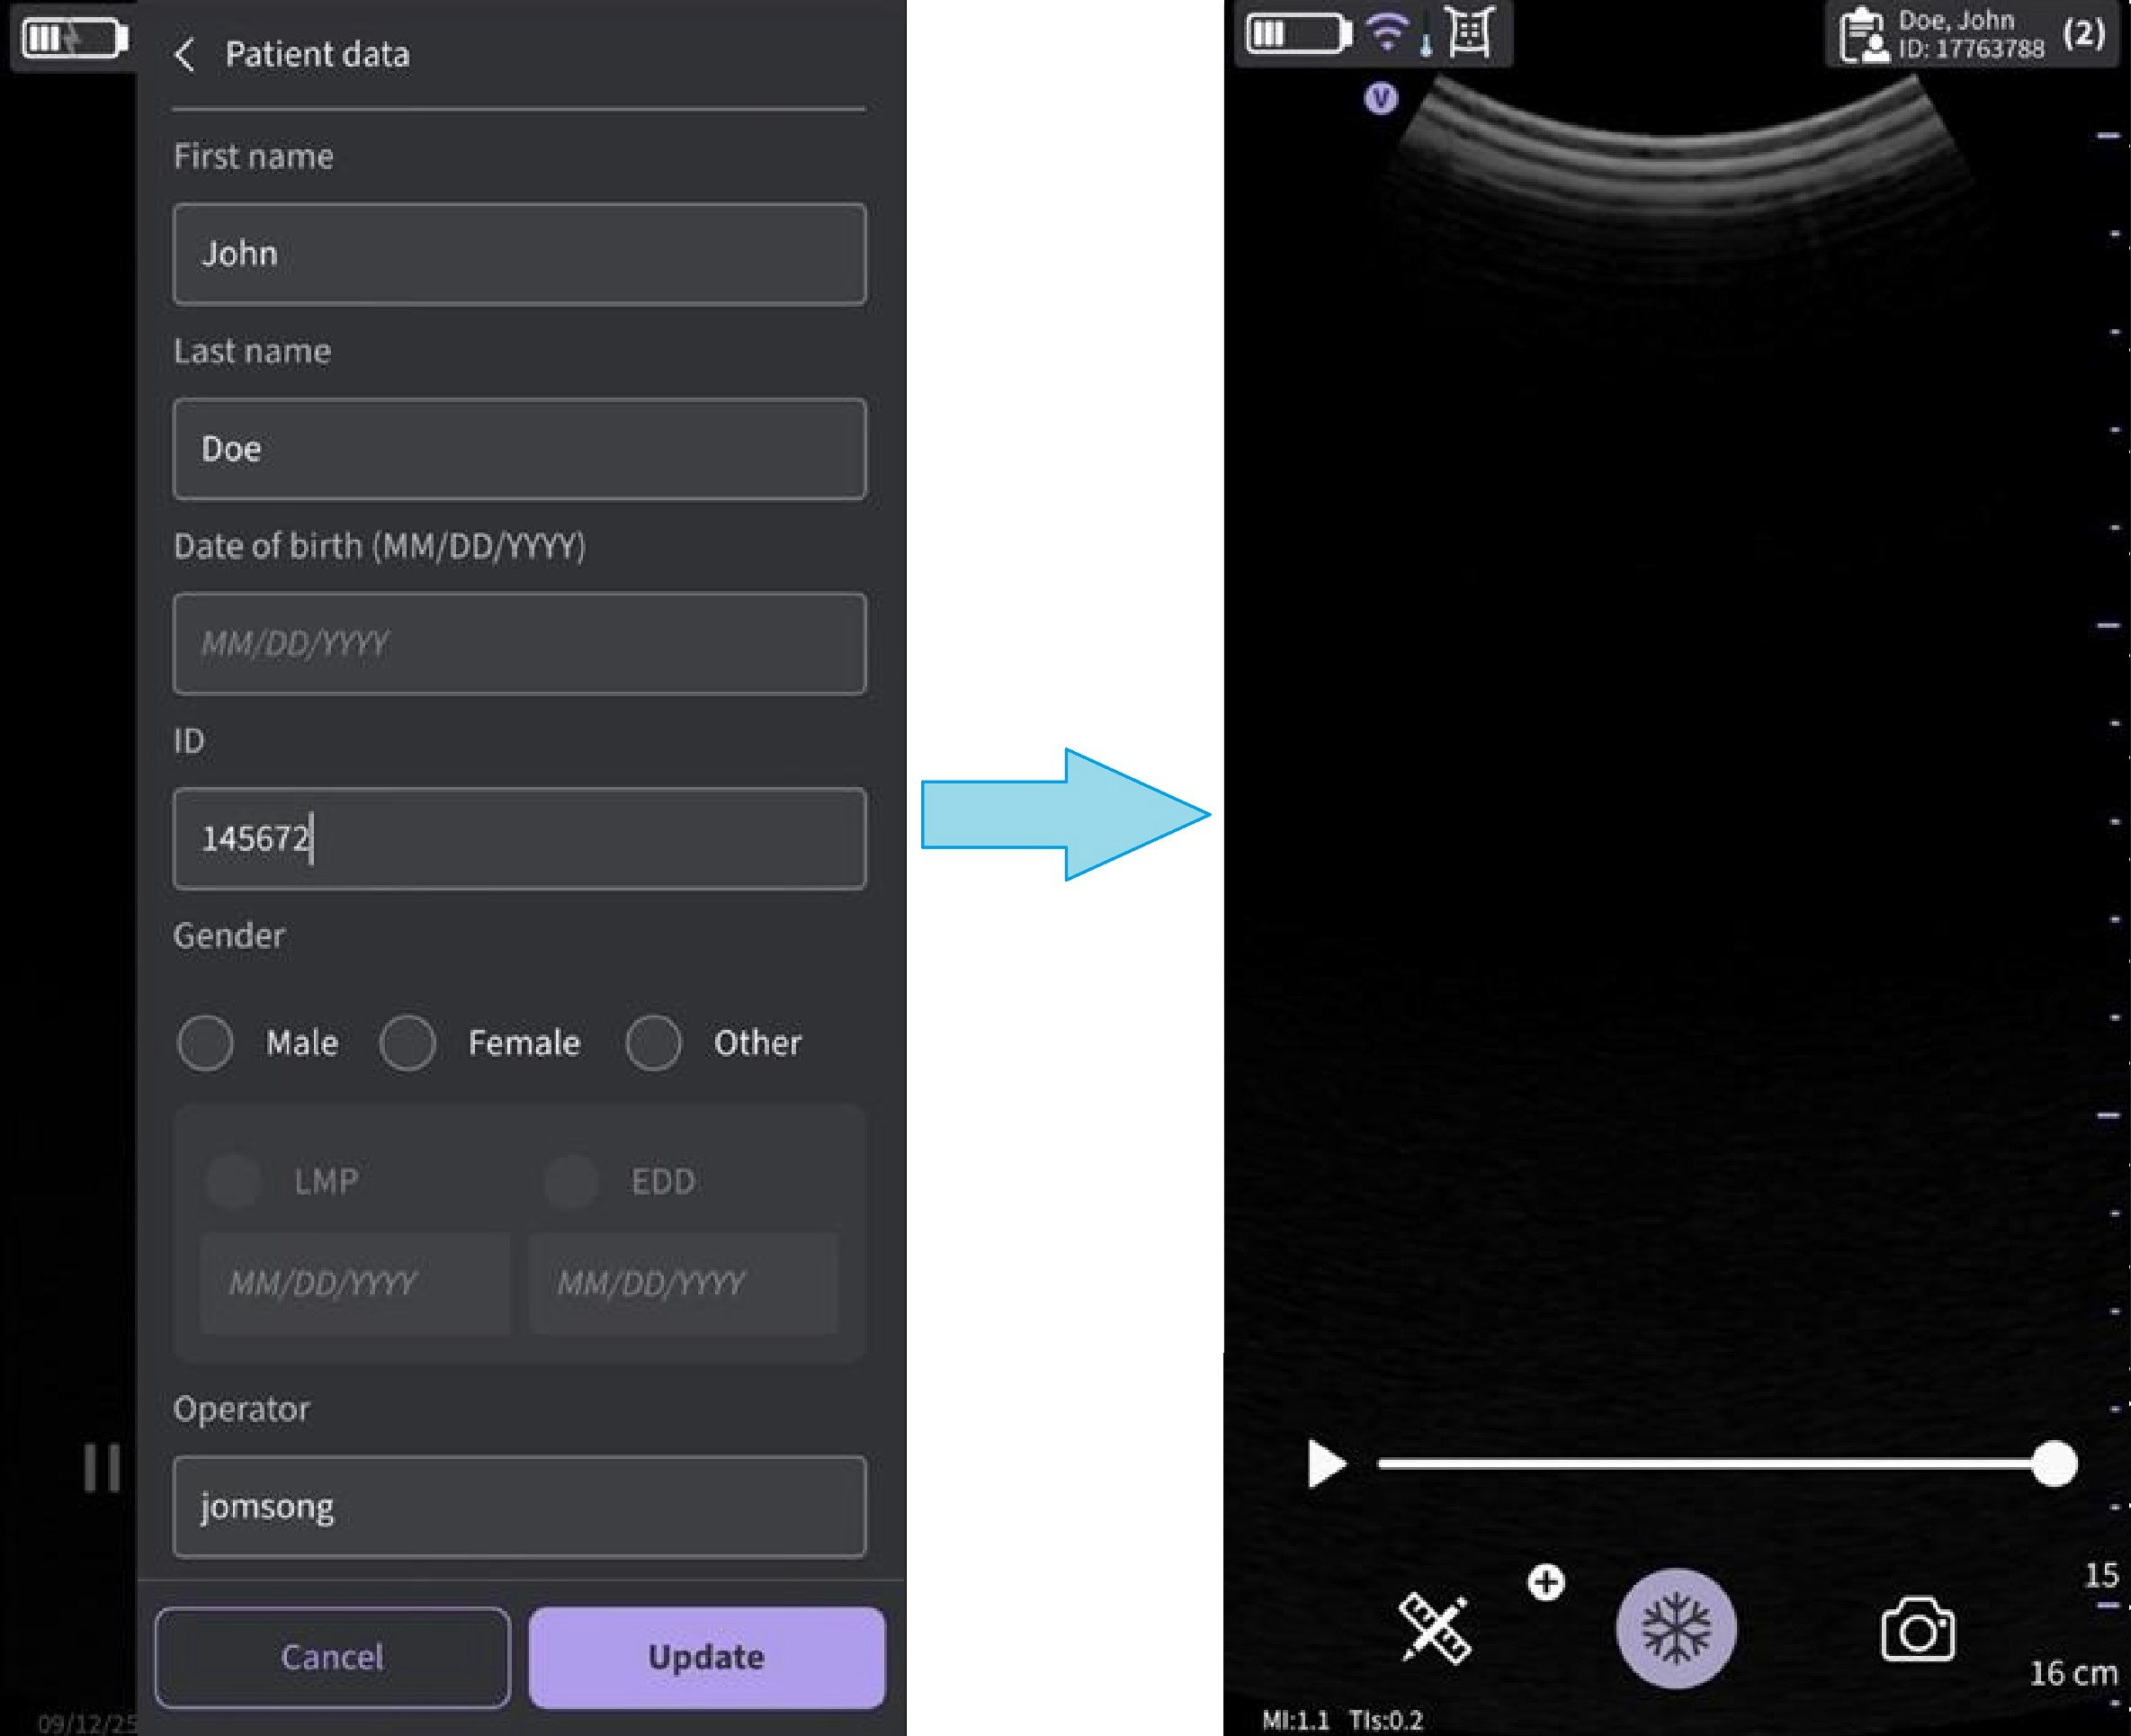
4. Press "Save" button to assign Patient data to the current exam. After successful assignment of Patient data, application takes you to the scan screen.The Study Description field is editable and has a 64-character limit. Patient’s Last Name, First Name and ID are shown on the top of the scan screen.
NOTE:
• Be aware that the Operator's Name field is filled with the text before the @ symbol of the email ID of the logged in user as the default value.
• Once the patient from the Modality Worklist server is assigned to an exam, the patient details assigned to that particular exam cannot be edited in the app.
5. Select the Exams tab to view the images/videos under current exam
Assign Patient Data From Modality Worklist Server To An Existing Exam
Vscan Air can download and refresh a DICOM modality worklist. An exam can be linked to an existing patient pulled from the worklist, prior to exporting to the DICOM image server.
To assign Patient data from a modality worklist server to an existing exam in the Vscan Air application, follow t.he procedure below.
1. Swipe from right to left (or) Press Exams icon on the top right corner.
Patient data - current exam
NOTE
Patient data can be assigned to an individual exam only. The Patient data cannot be assigned to more than one exam simultaneously.
2. Select the Exams tab. Select an Exam and assign Patient data.
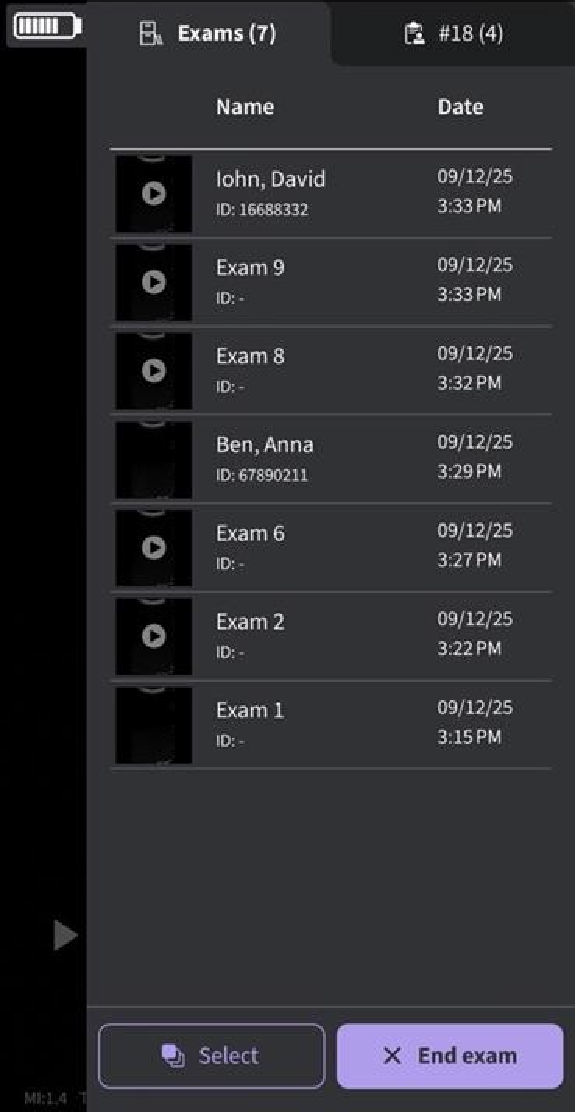
Exam tab
3. Press “Edit Patient” button at top right corner. Press the ![]() symbol on “New Patient” screen.
symbol on “New Patient” screen.

Edit Patient data
NOTE: Be aware that the Operator's Name field is filled with the text before the @ symbol of the email ID of the logged in user as the default value.4. Press the refresh button on the “Worklist” screen to import the list of patients from Modality Worklist Server. Patient data can be added to current exam in one of the following ways:
a. Tap on the desired Patient Name / Patient ID from the imported list of patients OR
b. Make a local search to find the details of a particular patient from the imported list of patients - by entering Patient Name / Patient ID in the “Filter” field on the screen OR
c. Make a remote search to find the details of a particular patient from selected Modality Worklist Server – by entering Patient ID in the “Patient Query” field on the screen.
Search patient
NOTE
When a remote search is initiated, only the records matching the search criteria will be displayed on the screen. If user moves away from the worklist screen and comes back, the worklist screen will display the imported list of records and clears the remote search results.

Worklist
NOTE:
• Make sure that the display device hosting Vscan Air app and the PC in which server is configured are
connected to same network.
• When you refresh the patient details in “worklist” screen, the connection between Vscan Air Probe and
display device may be temporarily interrupted.
• For any patient, if details are missing in Modality Worklist server, import of those patient records will be
rejected in the application and it will be displayed in the patient list as “Rejected”.
5. Press "Update" button to assign Patient data to the existing exam. After successful assignment of Patient data, application takes you to the scan screen.The Study Description field is editable and has a 64-character limit. Patient’s Last Name, First Name and ID are shown on the top of the scan screen.
Assign patient data
6. Press Exam icon to view the images/videos under the existing exam.
NOTE
• Be aware that the Operator's Name field is filled with the text before the @ symbol of the email ID of the logged in user as the default value.
• Once the patient from the Modality Worklist server is assigned to an exam, the patient details assigned to that particular exam cannot be edited in the app
Disclaimer: The information herein is not intended to replace the product’s User Manual. Please consult the User Manual for comprehensive information and cautionary guidance about the product’s operation and use.